With the shorter, darker days and the dipping temperatures, we all know that winter has arrived. And on those cold, dark days, sometimes it's difficult to be inspired when it comes to making dinner. Especially when you've got a hungry crew to feed. While I use my crockpot all year round, at this time of year I somehow feel that it's my best friend. There is nothing better than setting everything up in the morning and coming home to a delicious, hot meal, cooked and ready to go.
If you're looking for a new recipe that combines all the best of winter comfort food, today's blog post has the answer. Alli Berry is a Crock Pot cooking blogger and offered to share her wonderful stew recipe (and that great picture) with us. You can check out more fabulous recipes on her blog, What a Crock!
Winter can be a lovely time of year. You really can’t beat a beautiful, fresh snowfall. At least this is what I like to tell myself when it is dark at 4 pm and frigid outside.
One thing that can make winter more enjoyable is snuggling up at home with a good book and a large bowl of warm winter stew. I am very excited to share this new stew recipe with you that I created for such a scenario. I also wanted this to be a healthy stew to kick off 2013 on the right foot.
One of the things I like best about this recipe is the combination of rosemary with chicken and sweet potatoes. Rosemary is one of my favorite spices because of its distinct aroma and fresh taste. As an added bonus, rosemary is rich in antioxidants which help strengthen your immune system. Sweet potatoes also have great health benefits. Not only are sweet potatoes rich in iron and fiber, they also contain a lot of Vitamin C, which can help you fight off those pesky winter colds. This recipe is easy to make and can be altered to include other veggies if you wish.
6 boneless, skinless chicken thighs, cut into chunks
2 pounds sweet potatoes, peeled, cut into 1-2 inch cubes
1 cup of celery, chopped
½ onion, chopped
4 cloves garlic, peeled and chopped
2 cups chicken broth
½ teaspoon of dried rosemary (or 2 teaspoons of fresh rosemary)
2 bay leaves
1 teaspoon salt
½ teaspoon ground pepper
1 ½ tablespoons white wine vinegar
½ pound white button mushrooms, sliced
Place chicken at the bottom of the crock pot
Add all of the other ingredients (except the mushrooms) over chicken
Stir to combine
Cook on low for 4-5 hours, checking after 4 hours for doneness
Add mushrooms and cook on low for 1 more hour.
You can serve this stew as it is or over rice, quinoa, or couscous.
Showing posts with label recipes. Show all posts
Thursday, January 17, 2013
Tuesday, November 13, 2012
super (food) sweet potatoes
With Thanksgiving right around the corner the farmer's markets and grocery stores are overflowing with sweet potatoes. They're so fabulous we just had to do another blog post about them. Today we have Sydney Gallimore sharing why she loves these versatile, wonderful root vegetables so much and (shhh....) she's even giving us her mom's delicious recipe.
Fall is my favorite season for many different reasons. I love when the trees are bathed in hues of reds and oranges, when the weather cools down so I can wear my favorite scarf, and, of course, fall produce. My favorite fall ingredient is sweet potato.
Sweet potatoes contain lots of awesome health benefits. Here’s a quick list of all the good stuff packed into this delicious little tuber.
1. High in beta-carotene and other carotenoids which can strengthen our eyesight, boost our immunity to disease, and help fight cancer. Not to mention all of those antioxidants are great for fighting off the signs and affects of aging!
2. They’re high in vitamin B6 which can help prevent against heart attacks
3. Sweet potatoes are a good source of vitamin C, which can help ward off cold and flu viruses, and reduce stress. Vitamin C also produces collagen, which helps you maintain your youthful looking skin!
4. Sweet potatoes are also a source of potassium, which helps regulate heartbeat and nerve endings, which can prevent muscle cramps, reduce swelling, and regulate your kidneys.
5. Sweet potatoes have iron, which helps with red and white blood cell production, reduced stress levels, and helps regulate your immune system.
6. Sweet potatoes are high in fiber which is metabolized slowly, so you feel full longer; this may help fight against fatigue and weight gain! Sweet potatoes are a great diet food!
7. One average sized sweet potato contains about 112 calories, 2 grams of protein, and 26 grams of carbohydrates. The sweet potato is a true super food!
My favorite thing about sweet potatoes is how versatile they are. You can scour the Internet and find recipes for sweet and savory sweet potato dishes, and they’re all delicious. Or, pick your favorite potato recipe and simply substitute a sweet potato to increase your health benefits! My favorite way to serve sweet potatoes is in a soup. Here’s my mom’s recipe, which is both sweet and savory, and totally delicious!
2 tablespoons butter
1 tbsp olive oil
1 large onion, chopped
3 cloves garlic, minced
2 celery stalks, stalks and leaves chopped separately
2 pounds sweet potatoes peeled, cut into 1-inch pieces (about 6 cups)
1 tart green apple peeled, chopped
1 teaspoon granulated white sugar [note: change this to evaporated cane juice crystals]
2 tsp salt
2 tsp pepper
3 cinnamon sticks
3 sprigs fresh Thyme (1 tsp dried)
1/2 teaspoon ground nutmeg
4 1/2 cups chicken stock
1 1/2 cups heavy cream
3 tablespoons pure maple syrup
Sour Cream or Crème Fraîche as garnish
Heat oven to 400˚F
Spread the potato cubes evenly on a baking sheet, and drizzle with olive oil and roast for 20 minutes. Potatoes should be a bit under cooked, not yet tender
Melt the butter in a heavy pot over medium heat
Add onion, celery, sugar, and apple and sauté until soft
Add the garlic, cinnamon sticks, nutmeg, and thyme and sauté for 2 minutes
Add the chicken stock, potatoes, salt, and pepper and bring to a boil
Reduce heat and simmer uncovered about 15 minutes, or until potatoes are completely tender
Puree the soup in the pot using an immersion blender (or in a blender working in batches) until smooth Add the maple syrup and whisk in the cream over medium-low heat, until warm throughout
Season to your liking
Add water or simmer for a bit longer until soup reaches desired consistency
Ladle into bowls and garnish with sour cream or crème fraîche
Sydney Gallimore is content manager for Pippin Hill Farm, a boutique winery & wedding venue in Charlottesville, Virginia.
Photos: Wally Hartshorn
Fall is my favorite season for many different reasons. I love when the trees are bathed in hues of reds and oranges, when the weather cools down so I can wear my favorite scarf, and, of course, fall produce. My favorite fall ingredient is sweet potato.
Sweet potatoes contain lots of awesome health benefits. Here’s a quick list of all the good stuff packed into this delicious little tuber.
1. High in beta-carotene and other carotenoids which can strengthen our eyesight, boost our immunity to disease, and help fight cancer. Not to mention all of those antioxidants are great for fighting off the signs and affects of aging!
2. They’re high in vitamin B6 which can help prevent against heart attacks
3. Sweet potatoes are a good source of vitamin C, which can help ward off cold and flu viruses, and reduce stress. Vitamin C also produces collagen, which helps you maintain your youthful looking skin!
4. Sweet potatoes are also a source of potassium, which helps regulate heartbeat and nerve endings, which can prevent muscle cramps, reduce swelling, and regulate your kidneys.
5. Sweet potatoes have iron, which helps with red and white blood cell production, reduced stress levels, and helps regulate your immune system.
6. Sweet potatoes are high in fiber which is metabolized slowly, so you feel full longer; this may help fight against fatigue and weight gain! Sweet potatoes are a great diet food!
7. One average sized sweet potato contains about 112 calories, 2 grams of protein, and 26 grams of carbohydrates. The sweet potato is a true super food!
My favorite thing about sweet potatoes is how versatile they are. You can scour the Internet and find recipes for sweet and savory sweet potato dishes, and they’re all delicious. Or, pick your favorite potato recipe and simply substitute a sweet potato to increase your health benefits! My favorite way to serve sweet potatoes is in a soup. Here’s my mom’s recipe, which is both sweet and savory, and totally delicious!
2 tablespoons butter
1 tbsp olive oil
1 large onion, chopped
3 cloves garlic, minced
2 celery stalks, stalks and leaves chopped separately
2 pounds sweet potatoes peeled, cut into 1-inch pieces (about 6 cups)
1 tart green apple peeled, chopped
1 teaspoon granulated white sugar [note: change this to evaporated cane juice crystals]
2 tsp salt
2 tsp pepper
3 cinnamon sticks
3 sprigs fresh Thyme (1 tsp dried)
1/2 teaspoon ground nutmeg
4 1/2 cups chicken stock
1 1/2 cups heavy cream
3 tablespoons pure maple syrup
Sour Cream or Crème Fraîche as garnish
Heat oven to 400˚F
Spread the potato cubes evenly on a baking sheet, and drizzle with olive oil and roast for 20 minutes. Potatoes should be a bit under cooked, not yet tender
Melt the butter in a heavy pot over medium heat
Add onion, celery, sugar, and apple and sauté until soft
Add the garlic, cinnamon sticks, nutmeg, and thyme and sauté for 2 minutes
Add the chicken stock, potatoes, salt, and pepper and bring to a boil
Reduce heat and simmer uncovered about 15 minutes, or until potatoes are completely tender
Puree the soup in the pot using an immersion blender (or in a blender working in batches) until smooth Add the maple syrup and whisk in the cream over medium-low heat, until warm throughout
Season to your liking
Add water or simmer for a bit longer until soup reaches desired consistency
Ladle into bowls and garnish with sour cream or crème fraîche
Sydney Gallimore is content manager for Pippin Hill Farm, a boutique winery & wedding venue in Charlottesville, Virginia.
Photos: Wally Hartshorn
Thursday, October 18, 2012
un-stuffed cabbage casserole
![]() |
| slice of un-stuffed cabbage |
Cabbage is coming into season and there are so many delicious ways to serve it. While I love stuffed cabbage I confess that the time it takes to make all those little rolls (especially compared to how quickly they get scarfed down) is somewhat of a deterrent. This seems like a tasty solution; and since it makes 12 servings it would be great for a big family gathering (or for delicious leftovers).
Someday I will make stuffed cabbage leaves, the delicious galumkis that my mother and grandmother used to make…sort of. The family recipe was never written down, so this is a project for when time, patience, and creativity are simultaneously expanded. In the meantime, working on my cooking goal of exploring my Polish cooking roots, I found a Weight Watchers stuffed cabbage casserole, and set out to make a no-beef, more easily prepared version.
![]() |
| First Mix in Spices, Rice, Onion & Carrot |
I topped the filling with a thin tomato sauce. Originally I tried a layer of cabbage on the top, but the tomato sauce dried out instead of flavoring the cabbage. So I replaced this layer with a few thin cabbage strips. The meat and rice filling right below the tomato sauce draw the tomato flavor down into the casserole because the uncooked rice is “thirsty.”
![]() |
| Next Mix in Tomato Sauce, Egg & Broth |
You can use lean ground beef in this recipe if you prefer. I added paprika from my family recipe. You could choose various herbs, garlic powder, and/or a hint of cayenne. If you’re braver than I am, you can blend the meat mixture with your hands, like my Mom did. It’s faster, and if I’d had some latex gloves, I would have tried it.
[note from Mira: I find it's simple to mix meat mixtures like this in my blender. And since I'm often working with cold ingredients I don't get that chilled effect on my hands which I find unpleasant.]
[note from Mira: I find it's simple to mix meat mixtures like this in my blender. And since I'm often working with cold ingredients I don't get that chilled effect on my hands which I find unpleasant.]
~ 2 ½ lbs. cabbage
1 lb. ground turkey
2/3 cup shredded carrot
½ cup minced onion
½ cup brown rice
½ tsp. salt
1½ tbsp. paprika
1 large egg
1¼ cup chicken or veggie broth
24 oz jar tomato sauce
2 tbsp. wine vinegar
2 tsp. sugar
olive oil for greasing pan
Bring a large pot of water to a boil. Remove 3 outer leaves from cabbage to make the strips of cabbage for the topping.
Cut remaining cabbage into quarters without removing core.
Boil each quarter cabbage in water until tender, about 5 minutes.
Drain well and cool.
Chop cabbage quarters into ½ inch dice, discarding cores.
Boil the 3 cabbage leaves in water 3 - 4 minutes, until tender.
Remove with slotted spoon, drain and cool.
Cut out rib and make ½ inch strips of soft parts.
Dice ribs with quarter cabbages.
Preheat oven to 350 degrees F.
Put ground turkey into bowl and break up into pieces with wooden spatula.
Mix in carrot, onion, rice, salt, and paprika.
Beat egg together with ¼ cup broth till smooth.
Add this mixture and ½ cup tomato sauce to meat mixture and beat till evenly blended. Mix in half of the cooked chopped cabbage evenly.
Mix in carrot, onion, rice, salt, and paprika.
Beat egg together with ¼ cup broth till smooth.
Add this mixture and ½ cup tomato sauce to meat mixture and beat till evenly blended. Mix in half of the cooked chopped cabbage evenly.
To make the sauce, combine the remaining tomato sauce with wine vinegar and sugar.
![]() |
| Make An Even Layer of Meat on Cabbage |
Spread the remaining half of the cabbage in the bottom of the pan.
Pour the remaining (1) cup of broth around the edges of the pan.
Spoon on the meat mixture.
Smooth out with a rubber spatula to make an even layer.
Place the cabbage strips across the top, leaving space between them.
Pour tomato sauce over top of meat mixture and cabbage strips and spread into even layer.
Bake for 1½ hours.
Let stand at least 20 minutes before serving so liquid is absorbed.
Friday, October 12, 2012
swiss chard two ways
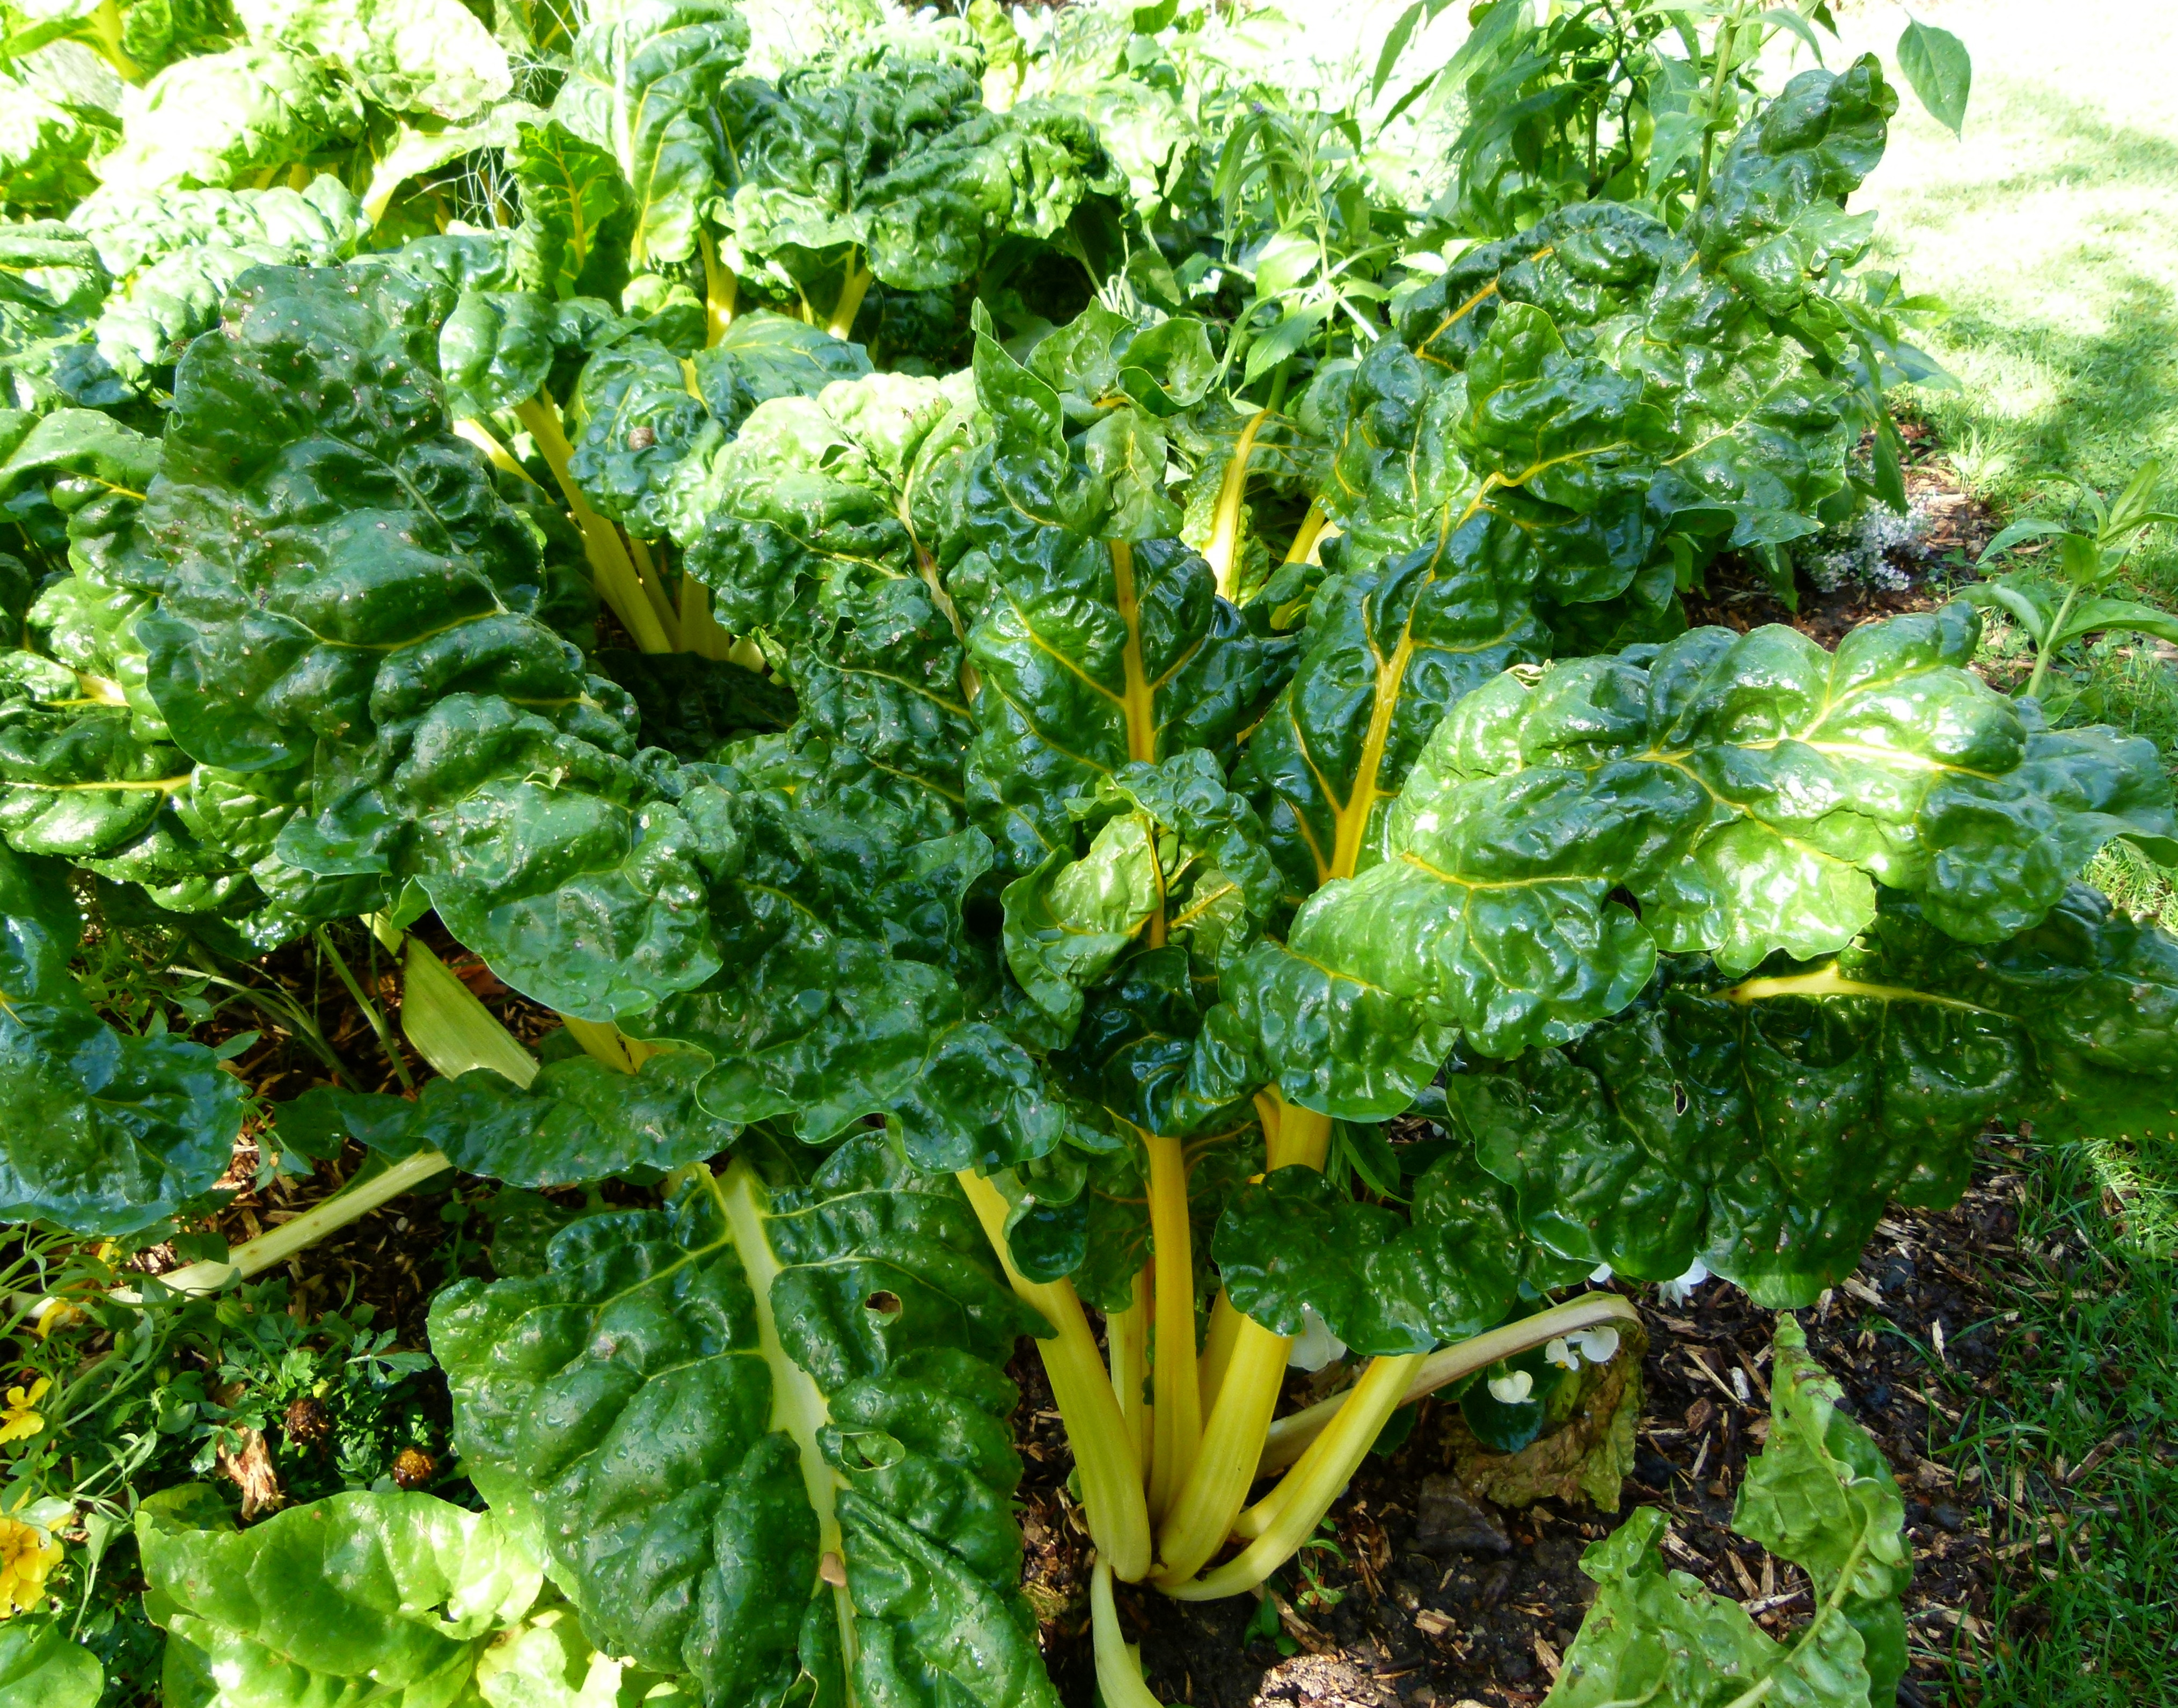
The other night I picked the last of my Swiss chard from our garden for dinner. It's one of my favorite dark leafy green vegetables. Antioxidant rich, loaded with vitamins K, A, and C, Swiss chard also provides a healthy dose of magnesium. Often when we eat it I make a simple sauteed greens. This time, however, I wanted to do something different and came up with these two recipes, using the entire leaf.
Although most people throw out the stems, they are delicious and can be cooked a variety of ways. These are the two recipes I created using all of the Swiss chard. I can't wait to plant more and enjoy this again.
Braised Carrots and Swiss Chard Stems
½ onion, diced
8 carrots, sliced into ½ inch pieces
Stems from Swiss chard, cut into ½ inch pieces
2 tablespoons butter
¼ cup water
Sea salt and fresh ground pepper to taste
In a large pan melt butter
Saute onions until starting to turn golden color
Add carrots and Swiss chard stems
Stir to coat with butter
Add water and bring to a boil
Reduce heat and cover
Cook until carrots are tender (about 15 minutes)
Add salt and pepper to taste
Creamed Swiss Chard
Large bunch of Swiss chard
½ cup boiling water
½ onion, diced
1 clove garlic, pressed
2 tablespoons butter
½ cup organic sour cream
½ cup organic whole milk
sea salt and fresh ground nutmeg to taste
Trim stems from Swiss chard
Cut leaves into 1” pieces
Wilt in boiling water until limp
In a large saucepan melt butter
Saute onions and garlic until onions start to turn golden color
Whisk sour cream and milk together
Pour over onions and heat until just starting to bubble
Add wilted Swiss chard leaves
Bring to a boil, stirring frequently
Reduce heat to just under boiling
Cook 5-7 minutes until sauce thickens slightly
Add sea salt and fresh ground nutmeg to taste
photo: Dinkum
Although most people throw out the stems, they are delicious and can be cooked a variety of ways. These are the two recipes I created using all of the Swiss chard. I can't wait to plant more and enjoy this again.
Braised Carrots and Swiss Chard Stems
½ onion, diced
8 carrots, sliced into ½ inch pieces
Stems from Swiss chard, cut into ½ inch pieces
2 tablespoons butter
¼ cup water
Sea salt and fresh ground pepper to taste
In a large pan melt butter
Saute onions until starting to turn golden color
Add carrots and Swiss chard stems
Stir to coat with butter
Add water and bring to a boil
Reduce heat and cover
Cook until carrots are tender (about 15 minutes)
Add salt and pepper to taste
Creamed Swiss Chard
Large bunch of Swiss chard
½ cup boiling water
½ onion, diced
1 clove garlic, pressed
2 tablespoons butter
½ cup organic sour cream
½ cup organic whole milk
sea salt and fresh ground nutmeg to taste
Trim stems from Swiss chard
Cut leaves into 1” pieces
Wilt in boiling water until limp
In a large saucepan melt butter
Saute onions and garlic until onions start to turn golden color
Whisk sour cream and milk together
Pour over onions and heat until just starting to bubble
Add wilted Swiss chard leaves
Bring to a boil, stirring frequently
Reduce heat to just under boiling
Cook 5-7 minutes until sauce thickens slightly
Add sea salt and fresh ground nutmeg to taste
photo: Dinkum
Thursday, August 16, 2012
cucumbers
![]() |
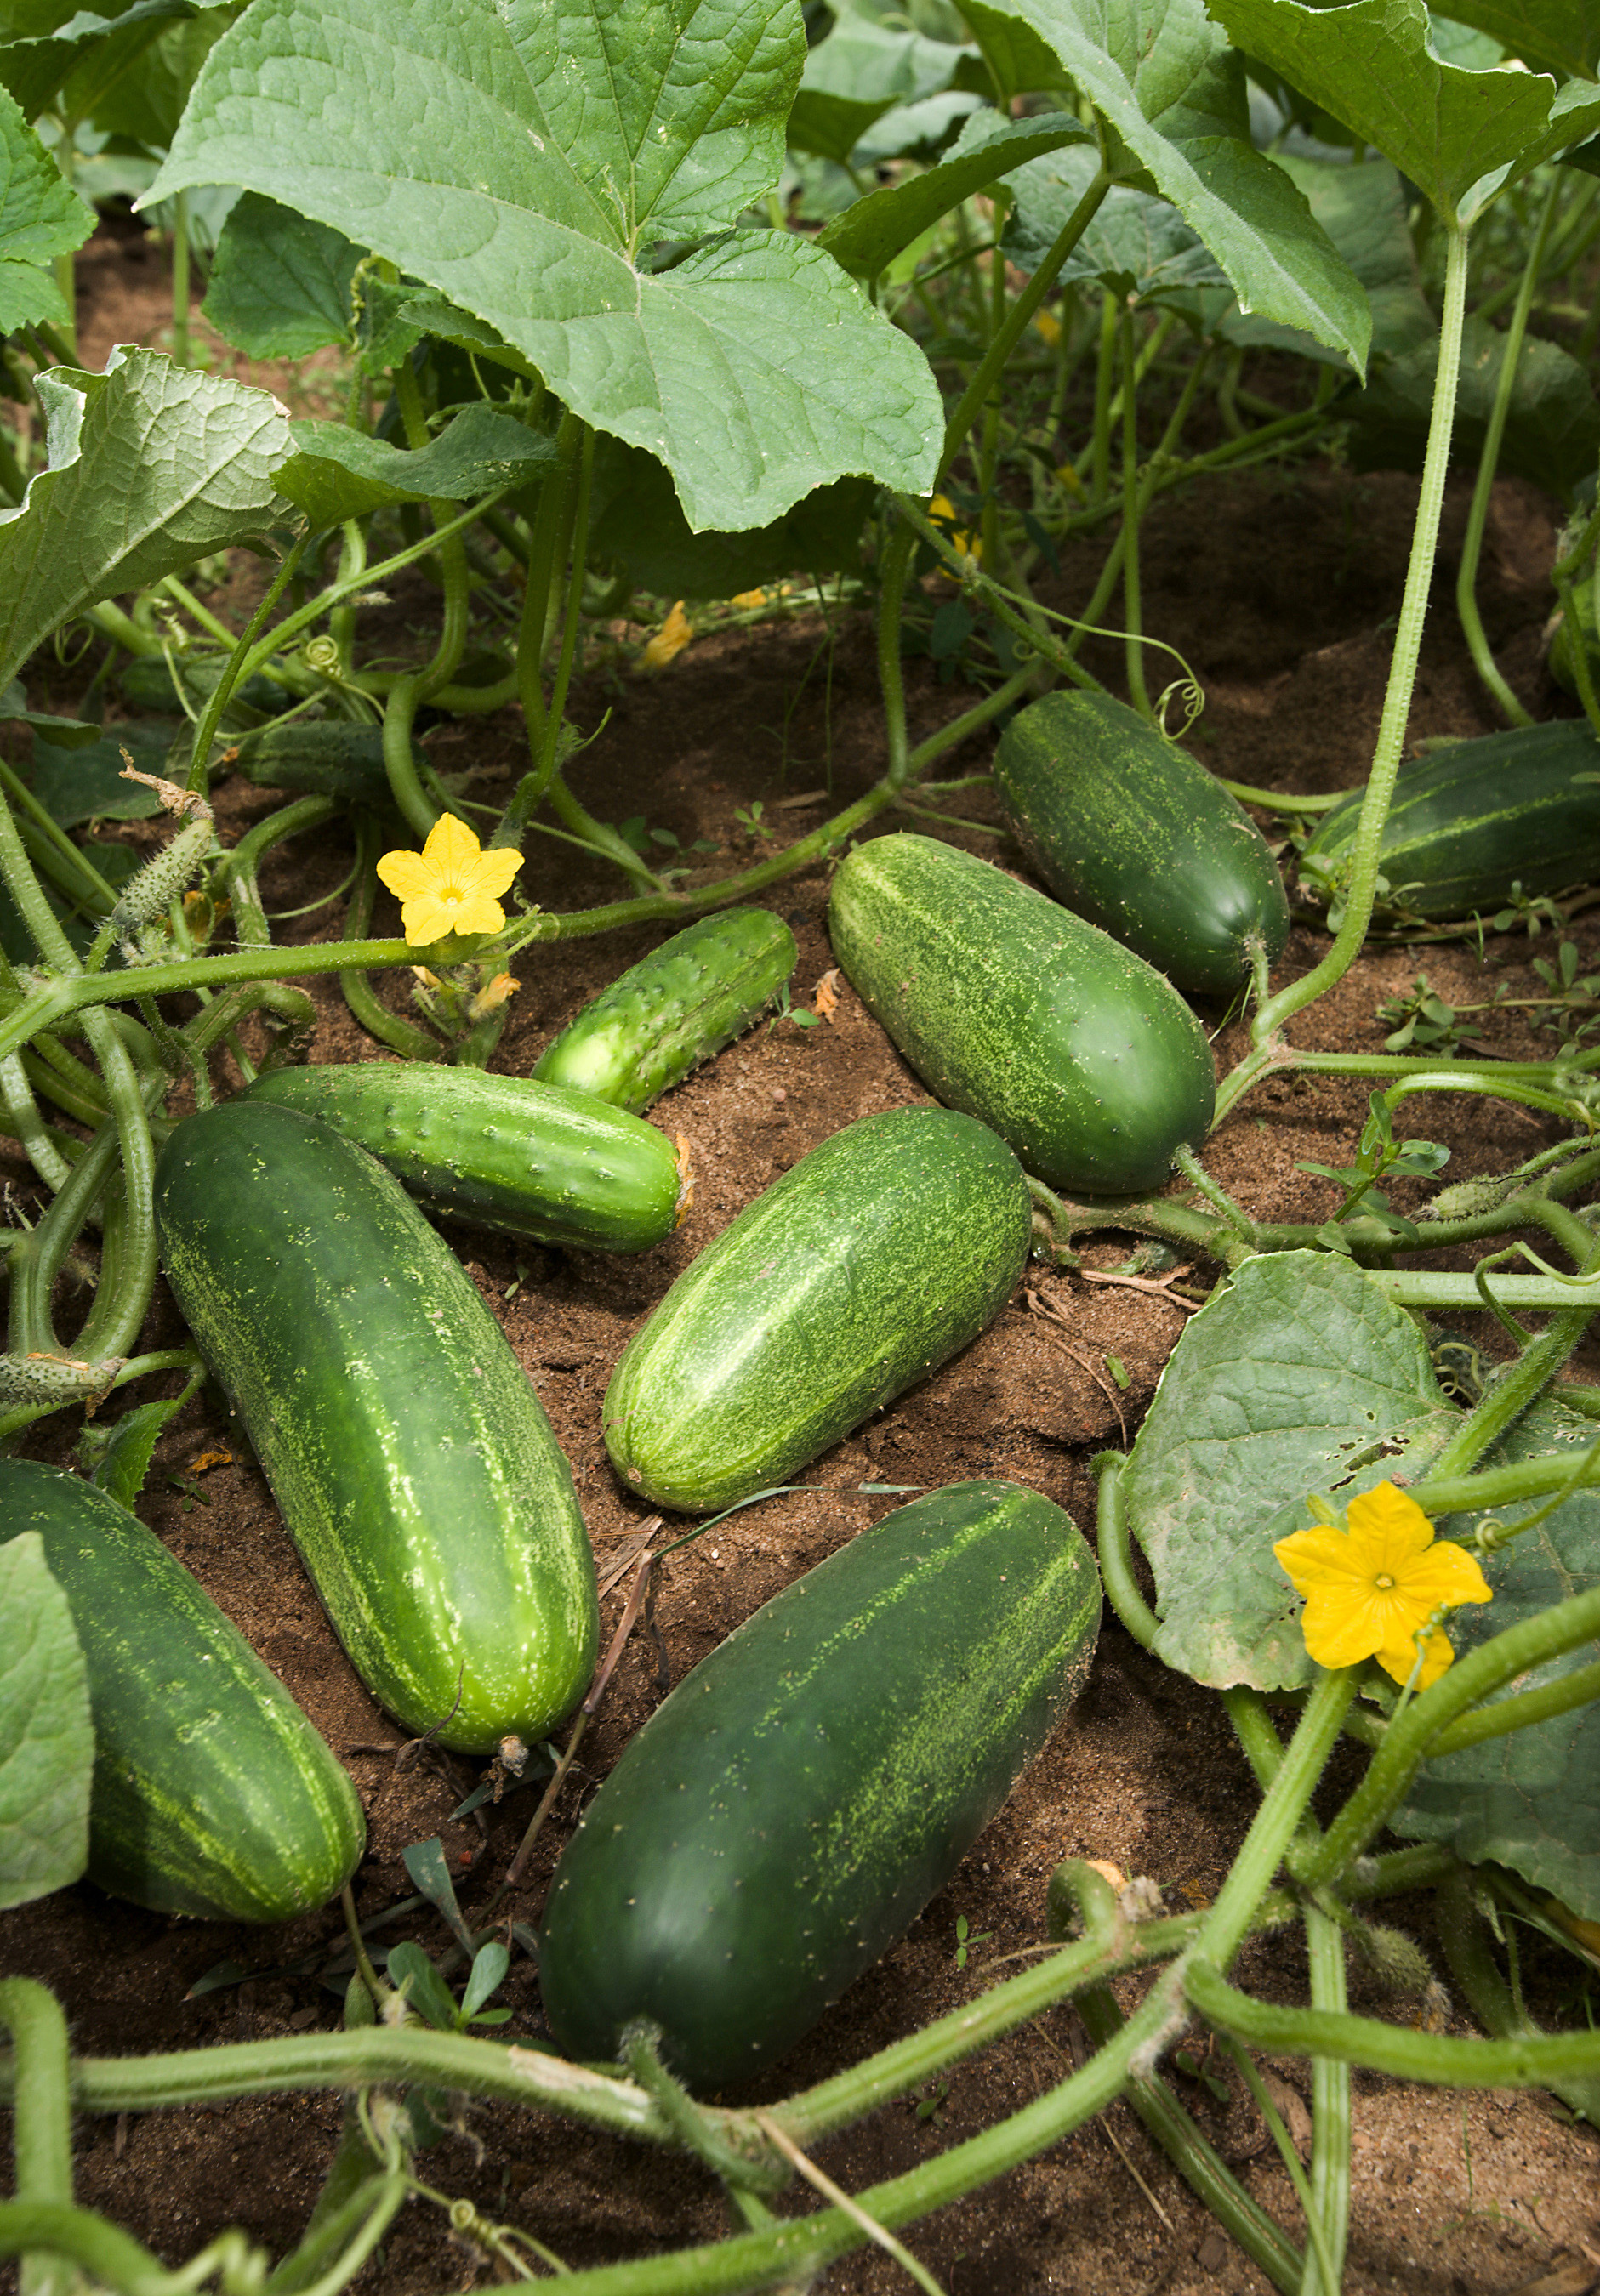
| cucumbers | photo: pdh |
Although we treat them like a vegetable, cucumbers are actually a fruit, related to melons like cantaloupe. High in antioxidants and anti-inflammatory, cucumbers are a good source of vitamin K which is important to help the body properly utilize vitamin D.
Refreshing, hydrating, and delicious, cucumbers can be prepared a number of different ways, used raw in salads, creamy salads (such as raita or tzatziki), or pickled.
One of my absolute favorite ways to eat them is as a refrigerator pickle because in season I just keep throwing more cucumbers into the jar. They only need to sit for a few days to be ready to eat. It's important to remember that because these are not hot water bathed, they will not last outside the refrigerator and even stored in the refrigerator are probably not good to keep for more than two weeks, I confess I eat them so quickly when I make them that I'm not really sure how long they would last.
Refrigerator Cucumber Pickles
1/2 gallon jar - sterilized
2 cups raw, unfiltered apple cider vinegar
6 cups of water
1/2 cup pickling salt
1 bunch fresh dill
3-4 cloves garlic cut in half
1 small vidalia onion, peeled and sliced - optional
Don't forget the cucumbers
In a medium pan combine vinegar, water and salt
Bring to a slow boil, stirring until salt is completely dissolved
Remove from heat and let cool completely
Add remaining ingredients including onion slices if desired
Wash and prepare cucumbers by cutting into slices or spears
Put as many as will fit into jar and still be submerged
Let sit 2-3 days before eating
Saturday, August 11, 2012
detox bath
![]() |
| bathing | photo: mconnors |
But bathing can be a powerful way to help balance our bodies. First there is the slow down, taking the time to soak. That relaxing time goes a long way toward counteracting the hectic pace at which most of us lead our lives. Baths can also, however, be a great way to help us remineralize our system. This is done through the use of something called a detox bath.
Our skin is our largest body organ, sometimes referred to as the "third kidney." What we put on it goes into our system. This works for both positive and negative ingredients. Often we are exposed to a lot of environmental stressors and/or we eat foods that may cause a more acidic body state. While a bath cannot counteract all of that it can help to balance us. Many people find that when they take a detox bath they feel much better and more relaxed. It's often recommended to take the bath immediately before bed.
While you can purchase a lovely scented Dead Sea Salt bathing product, you can also make a simple detox bath at home for pennies. It is often suggested to people that they not take this bath more than twice a week to be sure that they do not overwhelm their system.
Detox Bath
1 cup epsom salts
1 cup baking soda
5-7 drops relaxing essential oil
(the most relaxing ones are lavendar, ylang ylang, geranium, and vanilla)
Run a hot bath and add the ingredients
Soak for 20 minutes immediately before bed
Note: hot baths are not recommended if you are pregnant, nursing, or have a health condition which might be negatively affected by immersion in high heat.
Friday, August 10, 2012
august is peachy
![]() |
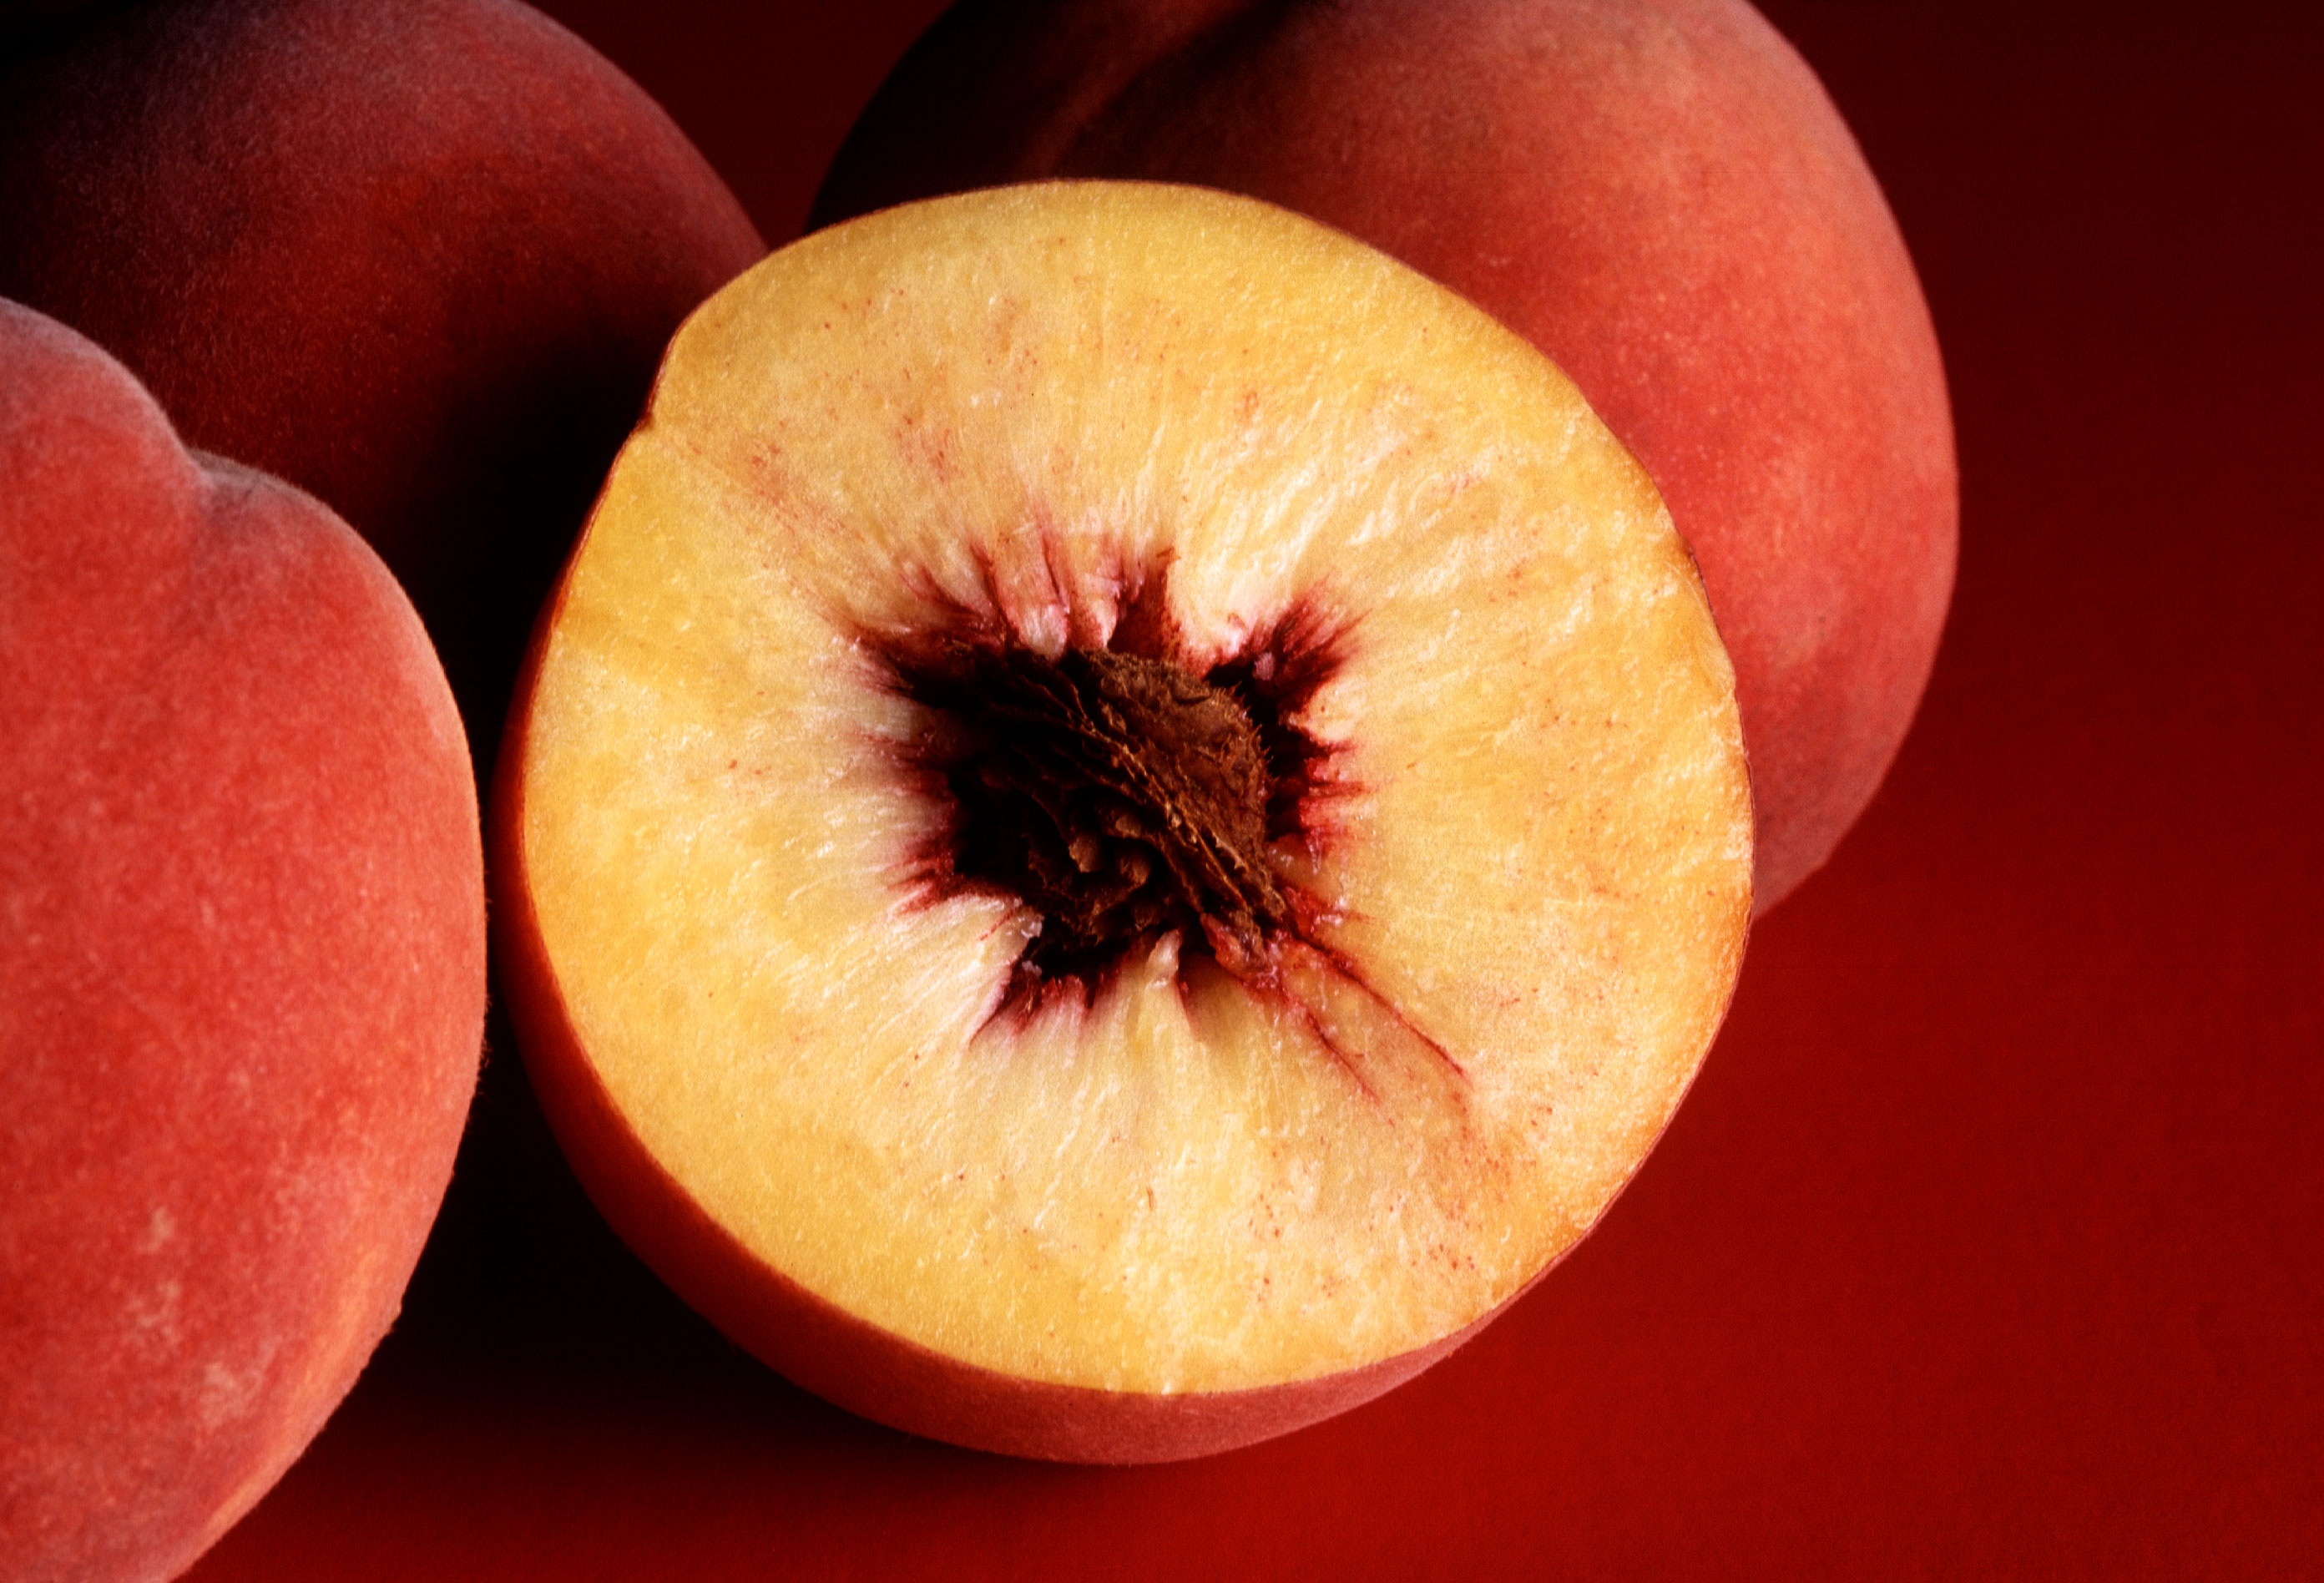
| peaches | photo: Grendelkahn |
A good source of vitamin C and A, peaches also provide a fair amount of potassium, beta-carotene (which becomes vitamin A), and fiber. When they are ripe and juicy they are also very hydrating.
There are many different ways to use peaches and to enjoy them. This particular recipe is from my mom. It's simple and easy to put together and a perfect dessert after just about any meal.
Frenchtown Cobbler
The biscuit topping is from a July 1997 issue of Gourmet magazine:
5 Tablespoons cold unsalted butter
1 cup all-purpose flour
2 Tablespoons yellow cornmeal
2 Tablespoons sugar
1 1/2 teaspoons baking powder
1/2 teaspoon salt
1/2 cup milk
1/2 teaspoon vanilla
preheat oven to 375 degrees F
Cut butter in pieces
In a bowl with a pastry blender or in a food processor blend or pulse together flour, cornmeal, sugar, baking powder, salt, and butter until the mixture resembles coarse meal
If using a food processor transfer to a bowl
Add milk and vanilla and stir until the mixture forms a dough
Drop topping by rounded spoonfuls onto filling (do not completely cover it) and bake in the middle of the oven 40 minutes, or until topping is golden and cooked through.
The filling is modified from one found in the July/August 1996 Cook's Illustrated
3-4 peaches, peel, pit, and slice thick
2 cups blackberries, rinsed
Mix 2 teaspoons cornstarch, 1/3 to 1/2 cup sugar, 1 teaspoon vanilla extract, and 1 Tablespoon brandy
Toss with fruit to coat
Serve with ice cream or lightly whipped cream
Friday, August 3, 2012
national watermelon day
| watermelon | photo: Beyond silence |
One of the most alkalizing foods, watermelon is a refreshing, hydrating, low calorie wonderful addition to summertime menus. High in vitamin A and C while also providing some magnesium and potassium, watermelon is a great antioxidant fruit. It also provides high levels of lycopene which studies have shown to be helpful in preventing various types of cancer.
Watermelon appears to also have some effect on lowering blood pressure.
There are many delicious ways to include watermelon into your summertime menus such as making watermelon water ice or granita, making agua fresca, fruit salads, or even a savory sweet salad. My current favorite fruit salad is rich in lycopene and anthocyanins, those dark rich fruits which are supportive of cognitive function while helping to reduce inflammation in the body. This salad is refreshing and satisfying, I've even been including it as part of my breakfast for a delicious treat.
Anthocyanin-rich Fruit Salad
2 cups watermelon, balled
1 cup blueberries, rinsed
1 cup strawberries, rinsed and sliced
1 cup cherries, rinsed, pitted, and quartered
dressing:
zest 1 small lime
2 tablespoons fresh lime juice
2 teaspoons poppy seeds
Mix together fruits
Mix together dressing in a separate cup
Pour dressing over fruits and toss gently
Let sit 30-60 minutes in the fridge before serving
Friday, July 13, 2012
take back your kitchen
I was talking with a friend of mine who recently moved to this area. She was stunned to discover how many people don't cook. It seemed very strange to her that so many eat out almost all the time or purchase prepared "convenience" foods. I think this is something which is happening not just where we live but all over the country.
While I no longer cook the way I used to when I had three small children at home, I do cook on a regular basis. In prior days I cooked a lot, every day. I still cook a lot but the meals tend to be simpler and less involved. I still use my slow cooker frequently however instead of feeding five it now feeds two to three with leftovers, a bonus as far as I am concerned. A hearty pot of soup, a tasty stew, these are all so easy, delicious and nourishing. And the leftovers are perfect for our current lifestyle.
I believe that just about anyone who walks into a house fragrant with the smells of a roasting chicken or a robust ragout will comment on how delicious that house smells. We know good food when we smell it, we just think we can cut corners to make it.
We've been sold a bill of goods about food and sacrificing "convenience" for time. I believe it's a myth. There are things that you can do to make your time in the kitchen faster or less involved. But there's no way that you can convince me that prepared foods in a box or a can are "just like homemade." Especially after you read the label and see how many non-food items are in that package. I also find that in spite of the rising cost of groceries your food dollars are well spent when you buy the ingredients for homemade wholesome food.
Additionally most of us have forgotten how to cook. A lot of people have lost the native understanding of how flavors go together, how spices work, what constitutes the basics of culinary knowledge. One of my biggest joys right now is watching my two older daughters taking their culinary knowledge to the next level. Working together with them in the kitchen or enjoying a fabulous meal that they have made from scratch. Sharing my cooking knowledge with them as they add their own twist to a dish or develop their own culinary style.
Just because you don't cook doesn't mean that these skills can't be relearned and you can't take back your kitchen. You can. And not only will it taste better and, I believe, be better for you, you're nourishing more that just your belly. There's something intrinsic about cooking and eating something that you have prepared yourself that quite simply nourishes the soul.
Here are a few simple, easy recipes that I have created which you can easily prepare at home:
Breakfast Quiche Muffins - these can be made in muffin form and frozen until needed. Or you can make it as a quiche and serve it for breakfast, lunch, or dinner. You need to adjust the time as it will take longer to cook if you cook it in a pie pan as a large quiche.
Black Bean Casserole - this is a great dish to serve as is with lots of steamed veggies on the side. But the leftovers are also fabulous for topping on salads, baked potatoes (with my salsa recipe), they also stand on their own reheated as leftovers very nicely.
Peas-y Peas and Celery - this is a fabulous side dish, easy to make and absolutely delicious.
For true kitchen basics here are some videos:
Giada DeLaurentis' Tomato Sauce - this is a basic sauce that goes with pasta, chicken, beef, and is very versatile
Mark Bittman's Roasted Tomato Soup - because nothing says comfort food like a good bowl of homemade tomato soup. This is the deluxe version and totally worth making
Homemade Chili - a classic comfort food it's always good to know how to make this
Bechamel Sauce - a white sauce a basic foundation for many different uses
Paula Deen's Macaroni and Cheese - once you start making homemade you'll never want the boxed stuff again. Be warned though this is a treat food and needs to be served as a side dish not the entree
Jill Sanpietro's Basic Pizza - much better than store bought and easier to make it just the way you like it
Whole food cooking doesn't have to be expensive.
While I no longer cook the way I used to when I had three small children at home, I do cook on a regular basis. In prior days I cooked a lot, every day. I still cook a lot but the meals tend to be simpler and less involved. I still use my slow cooker frequently however instead of feeding five it now feeds two to three with leftovers, a bonus as far as I am concerned. A hearty pot of soup, a tasty stew, these are all so easy, delicious and nourishing. And the leftovers are perfect for our current lifestyle.
I believe that just about anyone who walks into a house fragrant with the smells of a roasting chicken or a robust ragout will comment on how delicious that house smells. We know good food when we smell it, we just think we can cut corners to make it.
We've been sold a bill of goods about food and sacrificing "convenience" for time. I believe it's a myth. There are things that you can do to make your time in the kitchen faster or less involved. But there's no way that you can convince me that prepared foods in a box or a can are "just like homemade." Especially after you read the label and see how many non-food items are in that package. I also find that in spite of the rising cost of groceries your food dollars are well spent when you buy the ingredients for homemade wholesome food.
Additionally most of us have forgotten how to cook. A lot of people have lost the native understanding of how flavors go together, how spices work, what constitutes the basics of culinary knowledge. One of my biggest joys right now is watching my two older daughters taking their culinary knowledge to the next level. Working together with them in the kitchen or enjoying a fabulous meal that they have made from scratch. Sharing my cooking knowledge with them as they add their own twist to a dish or develop their own culinary style.
Just because you don't cook doesn't mean that these skills can't be relearned and you can't take back your kitchen. You can. And not only will it taste better and, I believe, be better for you, you're nourishing more that just your belly. There's something intrinsic about cooking and eating something that you have prepared yourself that quite simply nourishes the soul.
Here are a few simple, easy recipes that I have created which you can easily prepare at home:
Breakfast Quiche Muffins - these can be made in muffin form and frozen until needed. Or you can make it as a quiche and serve it for breakfast, lunch, or dinner. You need to adjust the time as it will take longer to cook if you cook it in a pie pan as a large quiche.
Black Bean Casserole - this is a great dish to serve as is with lots of steamed veggies on the side. But the leftovers are also fabulous for topping on salads, baked potatoes (with my salsa recipe), they also stand on their own reheated as leftovers very nicely.
Peas-y Peas and Celery - this is a fabulous side dish, easy to make and absolutely delicious.
For true kitchen basics here are some videos:
Giada DeLaurentis' Tomato Sauce - this is a basic sauce that goes with pasta, chicken, beef, and is very versatile
Mark Bittman's Roasted Tomato Soup - because nothing says comfort food like a good bowl of homemade tomato soup. This is the deluxe version and totally worth making
Homemade Chili - a classic comfort food it's always good to know how to make this
Bechamel Sauce - a white sauce a basic foundation for many different uses
Paula Deen's Macaroni and Cheese - once you start making homemade you'll never want the boxed stuff again. Be warned though this is a treat food and needs to be served as a side dish not the entree
Jill Sanpietro's Basic Pizza - much better than store bought and easier to make it just the way you like it
Whole food cooking doesn't have to be expensive.
Wednesday, July 11, 2012
three bean salad
This is a guest post by my Aunt Haya who recently shared a very sweet story about food, connections and memories. I love food stories. I like hearing where food came from, how it's changed, and the associations we make with our food; those moments that join us together. I agree with my Aunt that in this over stimulated fast paced world it's nice to have these kinds of connections to make us stop a moment and reflect on the various ways that our food comes into our lives. I also love how so many recipes, when shared, keep the name of the person who gifted them to us.
This evening my congregation will be hosting a group of 32 members of a congregation in Maryland who are on a 10 day tour of Israel with their Rabbi. After many guided tours to historical sites they are looking forward to sitting and talking with folks who live here. I have been asked to contribute my three bean salad to the meal. I am always glad to make and share it. While assembling the ingredients I stopped to think about it's entry into our lives.
Nowadays, three bean salad is well known all over the US and multiple variations are on the web. But while living in Houston (in the late 1960s), my husband and I made sure that each of us would have some private time each week, with each of our children. On one such outing I went with our son Daniel to attend an outdoor performance of an abridged version of some Gilbert and Sullivan operetta out on a lawn of The University of Houston. I think that it was the Pirates of Penzance, but am not sure.
I did not recognize anyone sitting near us in the audience but Daniel soon picked up a conversation with a boy near his age. I introduced myself to his mother and learned that they were in Houston for the summer while her husband, a school teacher, took summer classes at U of H, in order to eventually qualify to become a school principal in their home town somewhere I think in Arkansas or Alabama. He was often busy attending those summer program classes or working in the university library on his homework, so she and their son were exploring Houston on their own.
I invited them to join our family picnic the next week in Herman Park on the 4th of July--speeches, fire works and all. They were glad to accept and she brought three bean salad that she'd made. We'd never tasted one before. We all enjoyed it so I asked for her recipe. She wrote out on a piece of paper which I copied on to a file card after I returned home. I added her name Eula Ross. We got together only once or twice more during that summer, but three bean salad became a staple in our family's favorite summer recipes; particularly as a contribution to buffets and picnics.
Here in Israel the recipe has changed somewhat. I add diced fresh rosemary needles (that I pick fresh from the shrubs) to the chopped parsley in the original recipe and often use chickpeas for the third bean.
Today I found that I needed to purchase more chickpeas so used red beans as I have no red onion and wanted to add color other than the chopped sweet red pepper to the salad. I use less sugar in the dressing that Eula Ross recommended and the minimum quantity of oil. But each time I prepare this dish, whether or not I check the details on the old file card or fly free with improvisations, I think a special thanks to Eula Ross where ever she is now.
I am sharing this story with you because in this day and age of instant communication, information from people whom one never meets, an entire rainbow of recipes for any dish for which one could possible conceive of hankering, this older, slower, deeper time of meeting a stranger who became an acquaintance and shared her recipe and it's evolution to fit my current location and dietary preferences, pleases me a great deal.
Eula Ross' Three Bean Salad
2 cups each green string beans, yellow string beans, red beans or pinto beans,
2 stalks of celery cut into cubed shape pieces
1/2 red union diced
1 cup chopped fresh parsley
1/2 cup chopped bell peppers
1/2 cup vinegar
1/3 cup sugar
1/4 to 1/2 cup oil
1 1/2 teaspoons salt
1/4 teaspoon fresh ground black pepper
Whisk the five dressing ingredients together and pour over the vegetables.
Mix together cover and chill in fridge.
Keeps for 10 days
Aunt Haya's changes:
1 Tablespoon of chopped fresh rosemary to the parsley
I used frozen cut yellow and green beans which I steam over boiling water just until they thaw, so that they are still a bit crisp
I sometimes substitute chick peas for the red or pinto beans - I soak which ever of the three that I use over night, then cook them myself, drain them before adding to the salad. (I find commercial canned beans of all three types, over cooked (too soft) and too salty)
I use only 1 teaspoon of salt
About 1/3 cup of oil
reduce the amount of sugar
I like to use apple cider vinegar
This evening my congregation will be hosting a group of 32 members of a congregation in Maryland who are on a 10 day tour of Israel with their Rabbi. After many guided tours to historical sites they are looking forward to sitting and talking with folks who live here. I have been asked to contribute my three bean salad to the meal. I am always glad to make and share it. While assembling the ingredients I stopped to think about it's entry into our lives.
Nowadays, three bean salad is well known all over the US and multiple variations are on the web. But while living in Houston (in the late 1960s), my husband and I made sure that each of us would have some private time each week, with each of our children. On one such outing I went with our son Daniel to attend an outdoor performance of an abridged version of some Gilbert and Sullivan operetta out on a lawn of The University of Houston. I think that it was the Pirates of Penzance, but am not sure.
I did not recognize anyone sitting near us in the audience but Daniel soon picked up a conversation with a boy near his age. I introduced myself to his mother and learned that they were in Houston for the summer while her husband, a school teacher, took summer classes at U of H, in order to eventually qualify to become a school principal in their home town somewhere I think in Arkansas or Alabama. He was often busy attending those summer program classes or working in the university library on his homework, so she and their son were exploring Houston on their own.
I invited them to join our family picnic the next week in Herman Park on the 4th of July--speeches, fire works and all. They were glad to accept and she brought three bean salad that she'd made. We'd never tasted one before. We all enjoyed it so I asked for her recipe. She wrote out on a piece of paper which I copied on to a file card after I returned home. I added her name Eula Ross. We got together only once or twice more during that summer, but three bean salad became a staple in our family's favorite summer recipes; particularly as a contribution to buffets and picnics.
Here in Israel the recipe has changed somewhat. I add diced fresh rosemary needles (that I pick fresh from the shrubs) to the chopped parsley in the original recipe and often use chickpeas for the third bean.
Today I found that I needed to purchase more chickpeas so used red beans as I have no red onion and wanted to add color other than the chopped sweet red pepper to the salad. I use less sugar in the dressing that Eula Ross recommended and the minimum quantity of oil. But each time I prepare this dish, whether or not I check the details on the old file card or fly free with improvisations, I think a special thanks to Eula Ross where ever she is now.
I am sharing this story with you because in this day and age of instant communication, information from people whom one never meets, an entire rainbow of recipes for any dish for which one could possible conceive of hankering, this older, slower, deeper time of meeting a stranger who became an acquaintance and shared her recipe and it's evolution to fit my current location and dietary preferences, pleases me a great deal.
Eula Ross' Three Bean Salad
2 cups each green string beans, yellow string beans, red beans or pinto beans,
2 stalks of celery cut into cubed shape pieces
1/2 red union diced
1 cup chopped fresh parsley
1/2 cup chopped bell peppers
1/2 cup vinegar
1/3 cup sugar
1/4 to 1/2 cup oil
1 1/2 teaspoons salt
1/4 teaspoon fresh ground black pepper
Whisk the five dressing ingredients together and pour over the vegetables.
Mix together cover and chill in fridge.
Keeps for 10 days
Aunt Haya's changes:
1 Tablespoon of chopped fresh rosemary to the parsley
I used frozen cut yellow and green beans which I steam over boiling water just until they thaw, so that they are still a bit crisp
I sometimes substitute chick peas for the red or pinto beans - I soak which ever of the three that I use over night, then cook them myself, drain them before adding to the salad. (I find commercial canned beans of all three types, over cooked (too soft) and too salty)
I use only 1 teaspoon of salt
About 1/3 cup of oil
reduce the amount of sugar
I like to use apple cider vinegar
Tuesday, June 5, 2012
antifreeze in your ice cream
![]() |
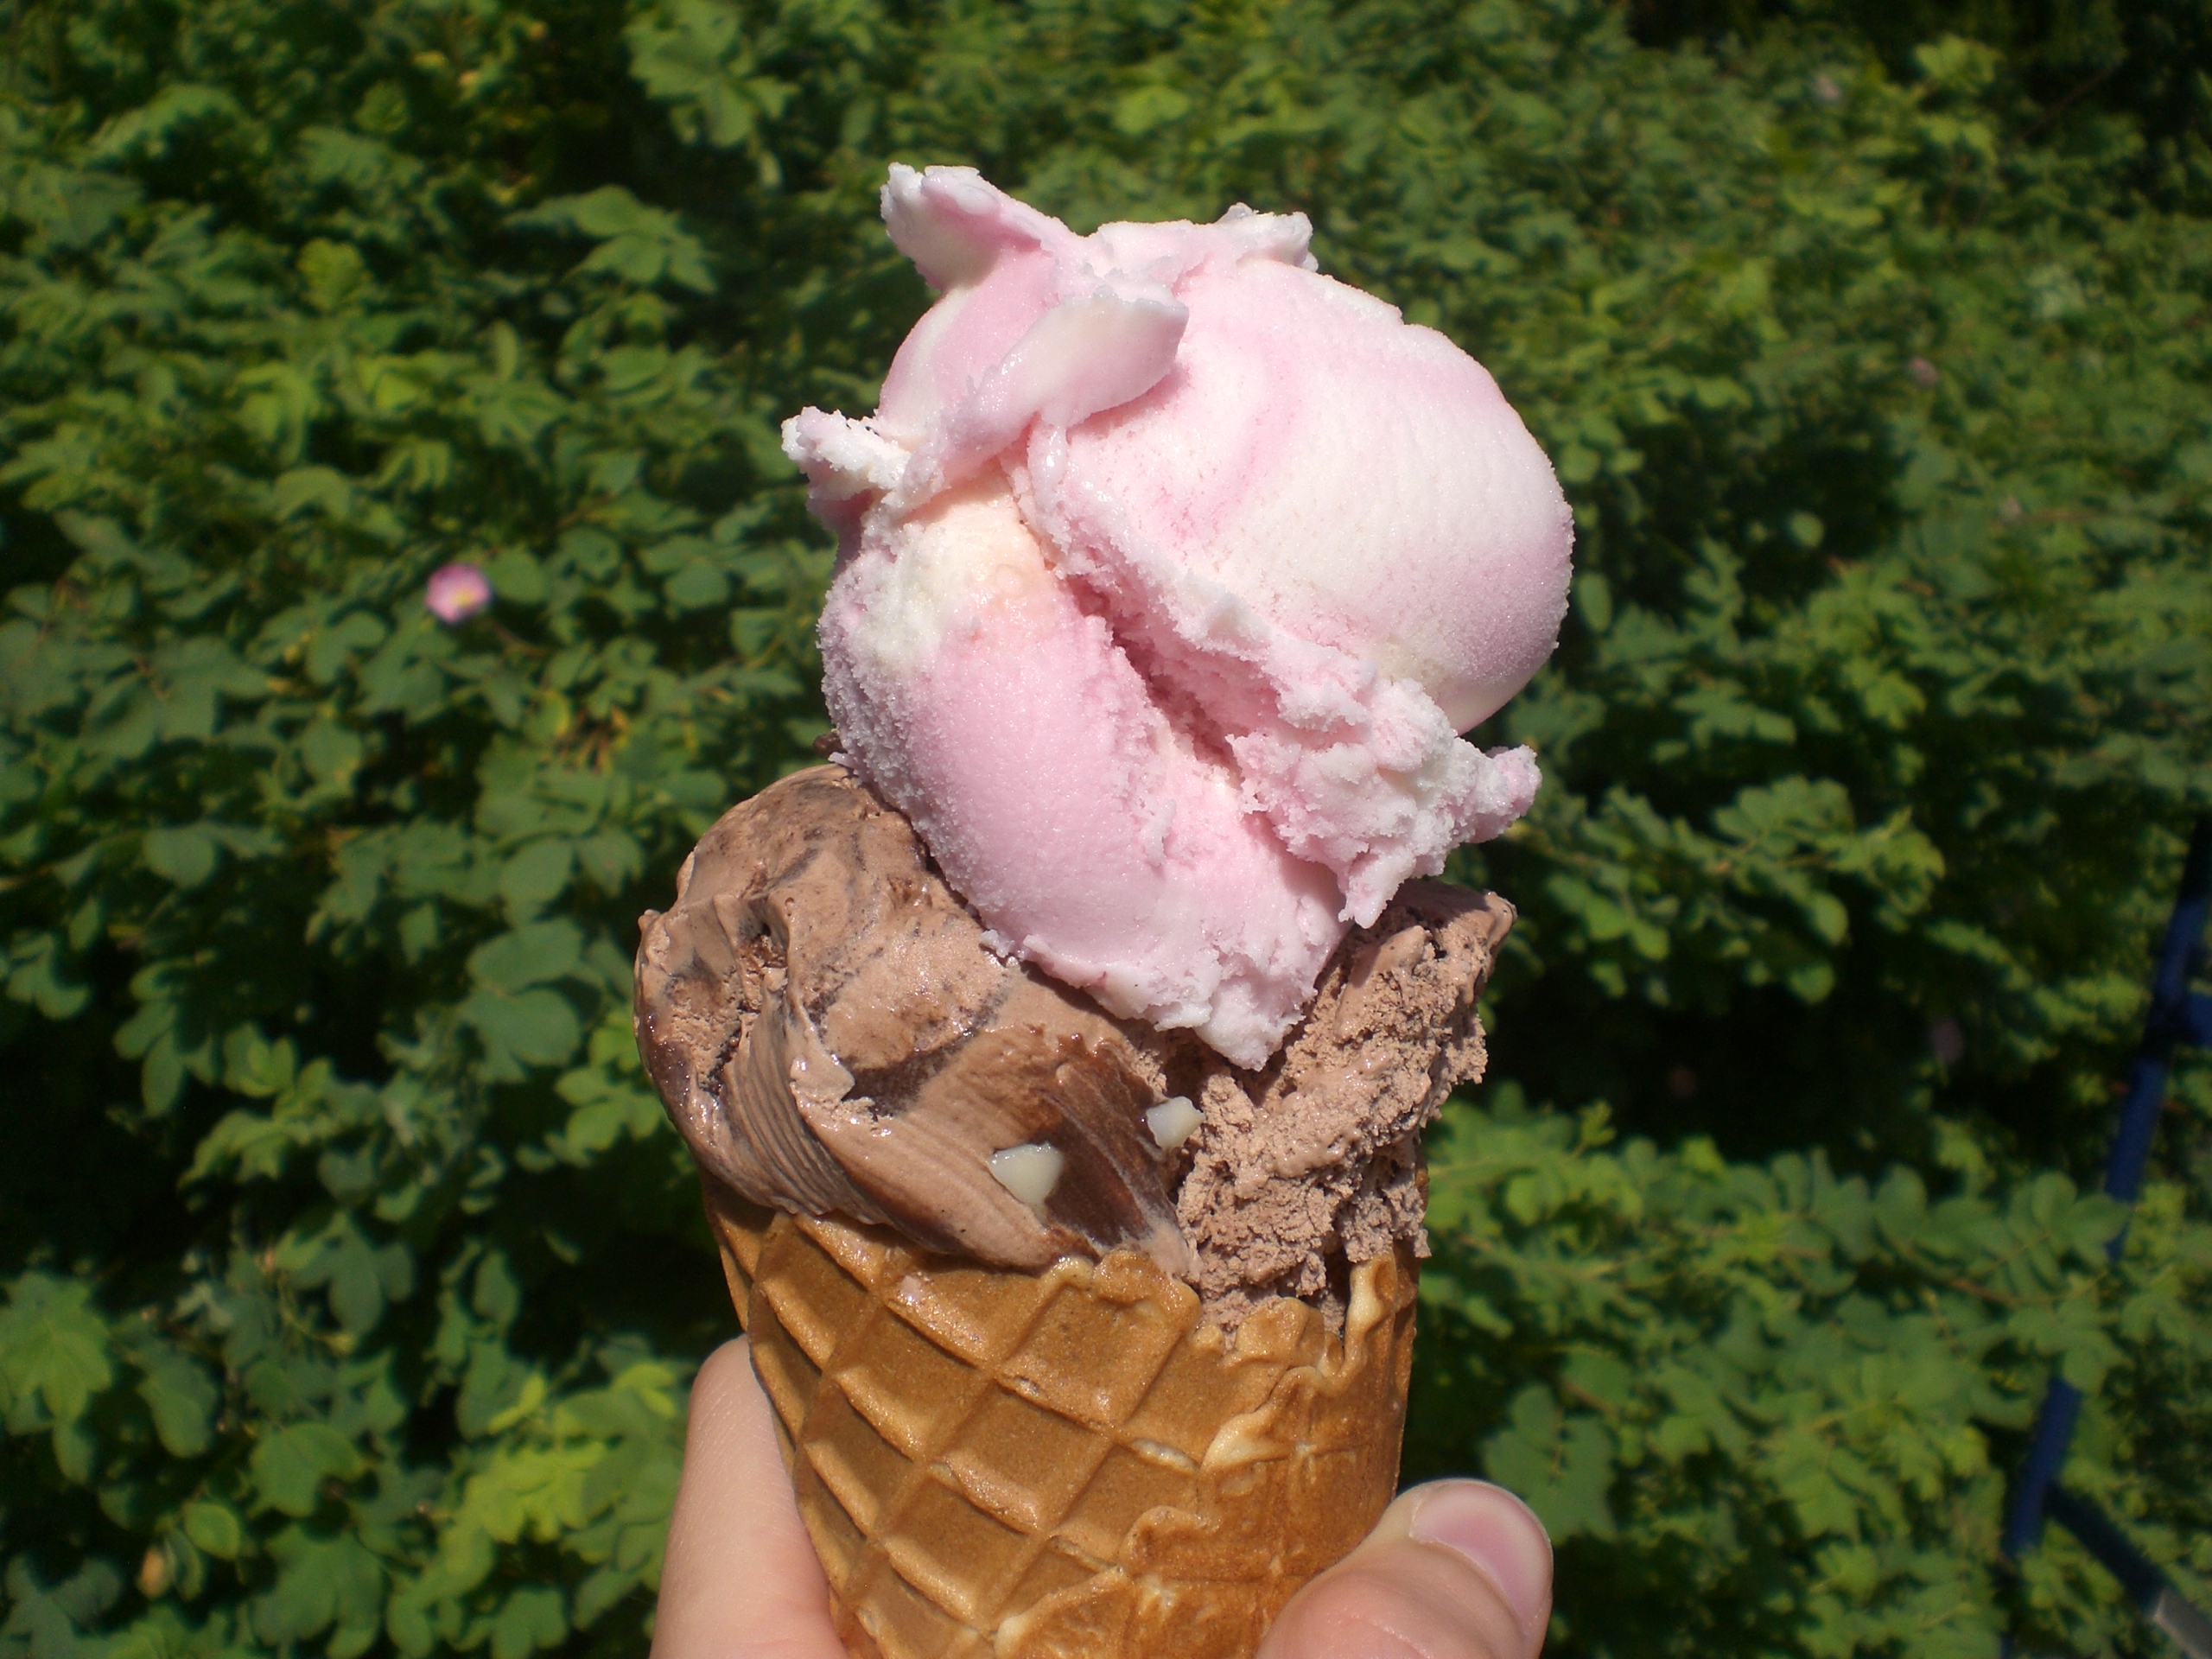
| ice cream | photo: fruhstuckbeistaphanie |
If you are looking for a cool summer treat you may want to consider making your own frozen confections. It turns out that there is a little known ingredient called propylene glycol hiding out in your ice cream. Considered a "non-toxic" antifreeze (as opposed to ethylene glycol which is highly toxic) many manufacturers use it in a wide variety of foods, especially ice cream. While it prevents your car from freezing it also keeps your ice cream smooth and prevents ice crystals from forming. Homemade ice cream turns fairly hard once frozen completely but this doesn't seem to happen with a lot of commercial ice creams. Now you know why.
Looking for it on the label provides an even bigger shock. Propylene glycol is not listed. Why? It turns out there is a, previously unknown to me (and presumably all of you), USDA regulation which covers incidental food additive labeling. This labeling allows the manufacturers to not include this ingredient on the label. My research so far seems to indicate that propylene glycol is covered under this regulation.
Unfortunately it does not take into effect the "ick" factor (after all who really wants to eat anti-freeze, even if it is the "non-toxic" variety?). Nor does it take into effect the fact that there are people who are highly sensitive to the substance. While I don't know how much propylene glycol is in ice cream I'm assuming it's not a huge amount. However if you eat a lot of ice cream, or frosting, or other foods that contain it you could be getting a significant exposure.
Apparently people who suffer from vulvodynia and interstitial cystitis can be particularly sensitive. It's known to cause skin problems when it appears in lotions, asthma or other allergies in children exposed through airborne sources, and large doses administered orally have been been shown to have a depressive effect on the central nervous system in animals. The challenge with the large dose testing is that because it's not labeled we do not know how much we may potentially be exposed to through ingestion or through osmotic skin absorption.
What can you do to avoid it? That's not so easy since it's not labeled. Still want those creamy, cool summer treats? Consider making your own. Here are a couple of recipes that really hit the spot when the temperatures are climbing outside.
Strawberry or raspberry water ice, recipe from Good Things by Jane Grigson
1 lb. strawberries or raspberries
1 cup sugar
1-2 cups water
juice of 1 lemon
juice of 1 orange
5 tablespoons orange liqueur, or kirsch
2 egg whites (optional)
Put the fruit through a blender.
Make a syrup of the sugar and 1/2 cup water.
When it is cool add the puree and strain.
Flavor to taste with lemon juice.
Dilute with the extra water if required.
Pour into a container, stirring the frozen sides of the mixture into the more liquid middle part every so often. With shallow trays this needs to be done every half hour; deep boxes can be left longer.
In 2-3 hours, the time depends on the depth of the mixture, you will have a thick mush of iced granules, called a granita.
IN 3-4 hours you will have a firm but not impenetrable block of water ice ready to be turned into sorbet.
Beat the egg whites in a large bowl until they're stiff.
Add spoonfuls of ice gradually, if properly done the mixture blow up to a mass of white foam.
Refreeze in a larger container until the sorbet has the consistency of firm snow.
Add the liqueur gradually at the end during the last stirring; with the sorbet add when ice and beaten egg white are mixed together.
Vanilla Ice Cream, recipe from Nourishing Traditions by Sally Fallons
makes 1 quart
3 egg yolks
1/2 cup maple syrup
1 tablespoon vanilla extract
1 tablespoon arrowroot
3 cups heavy cream, preferably raw, not ultra-pasteurized
Beat egg yolks and blend in remaining ingredients.
Pour into an ice cream maker and process according to instructions.
For ease of serving, transfer ice cream to a shallow container, cover and store in the freezer.
I have found that adding 1-2 cups of fresh fruit makes a wonderful addition to this recipe
And in a side note: as an outcome of my research I did manage to find an online source for propylene glycol free flavoring.
disclaimer: cmp.ly/5
Wednesday, May 30, 2012
roasted corn salad
![]() |
| roasted corn salad |
This is my latest creation. It was late by the time we ate and I was too hungry to stop and get out the camera. When I remembered to take this picture there was, I kid you not, only three spoonfuls of salad left. That's how good it is. The general family consensus is that it's a keeper. Hope you think it is too.
Roasted Corn Salad - 5-6 servings
3 ears of corn
1 red bell pepper diced
3 spring onions, cleaned and diced
1/2 cup celery diced
1 clove garlic, pressed
1 small bunch of cilantro minced
1/3 cup extra virgin olive oil
1 small lime juiced
sea salt and pepper to taste
Shuck the corn and cook in a pot of water until just starting to boil
Remove from the water, pat dry and place on a medium high grill
Turn corn occasionally to prevent burning
(although my
When corn is slightly browned all over remove from grill
Using a sharp knife remove kernels from cob and place into a bowl
Add bell pepper, spring onions, celery, garlic, and cilantro
Mix well
In a separate container whisk together olive oil, lime juice, salt, and pepper
Pour dressing over corn salad and toss well to coat evenly
Friday, April 27, 2012
making mayonnaise
A couple of weeks ago I blogged about, among other things, making my own mayonnaise. Sam asked for the recipe. It would have been very simple to just give you the recipe but I decided it would be more fun to wait until I needed to make it and then take a few pictures.
I began making my own mayonnaise probably about 15 years ago after a visit to my husband's grandmother, Mamie. She made her own mayonnaise. All of it. I'm not sure she ever bought a jar in her entire life. During this particular visit she happened to need mayonnaise while we were there so she assembled all of the ingredients and made it. I was delighted to see how easy it was. Homemade mayonnaise is so much creamier and more flavorful than store-bought, my family was hooked.
The recipe that I use is a modified combination of the recipe from Joy of Cooking (page 363 in my 1975 edition if you care to look it up) and the way that Mamie made it. Quick, easy, and delicious; I make it all the time.
The ingredients are simple:
1 egg
3/4 t. dry mustard
1 t. sea salt
1 cup olive oil
3 T. tarragon vinegar
I confess that the tarragon vinegar doesn't look so hot in the bottle so I staged that by adding a few leaves of fresh tarragon to the pre-measured amount in a glass. Tarragon vinegar is made by putting a bunch of tarragon into a bottle of white wine vinegar and letting it sit "for a while." If you don't like tarragon, don't use it. I have also made this recipe with raw apple cider vinegar when I didn't have any tarragon vinegar on hand.
The eggs are an issue for some people. I'm lucky enough to have a friend that I can get fresh eggs from. If I don't see her often enough I also have three farmer's markets where I can buy fresh, pastured eggs. So I'm okay with the idea of using uncooked eggs. It is, however, up to you.
Place the egg, 1/4 C. oil, salt, and mustard into a container. Blend well. I use a stick blender which I think is one of the best kitchen gadgets ever invented. You can whisk this together if you don't have a blender however it takes a long time and when it starts getting really thick it's a bit of challenge.
When this is all well blended drizzle in another 1/4 C. olive oil and blend well again. Then add the tarragon vinegar, blend well. Add the remaining 1/2 C. olive oil slowly and blend well a final time.
The end result is a delicious, creamy mayonnaise. It's a little thin at first but after it sits in the refrigerator it firms up quite a bit and is just fabulous spread on sandwiches, in dressings, or any other way you choose to use mayo. My particular favorite is for tomato sandwiches.
I began making my own mayonnaise probably about 15 years ago after a visit to my husband's grandmother, Mamie. She made her own mayonnaise. All of it. I'm not sure she ever bought a jar in her entire life. During this particular visit she happened to need mayonnaise while we were there so she assembled all of the ingredients and made it. I was delighted to see how easy it was. Homemade mayonnaise is so much creamier and more flavorful than store-bought, my family was hooked.
The recipe that I use is a modified combination of the recipe from Joy of Cooking (page 363 in my 1975 edition if you care to look it up) and the way that Mamie made it. Quick, easy, and delicious; I make it all the time.
The ingredients are simple:
1 egg
3/4 t. dry mustard
1 t. sea salt
1 cup olive oil
3 T. tarragon vinegar
I confess that the tarragon vinegar doesn't look so hot in the bottle so I staged that by adding a few leaves of fresh tarragon to the pre-measured amount in a glass. Tarragon vinegar is made by putting a bunch of tarragon into a bottle of white wine vinegar and letting it sit "for a while." If you don't like tarragon, don't use it. I have also made this recipe with raw apple cider vinegar when I didn't have any tarragon vinegar on hand.
Place the egg, 1/4 C. oil, salt, and mustard into a container. Blend well. I use a stick blender which I think is one of the best kitchen gadgets ever invented. You can whisk this together if you don't have a blender however it takes a long time and when it starts getting really thick it's a bit of challenge.
When this is all well blended drizzle in another 1/4 C. olive oil and blend well again. Then add the tarragon vinegar, blend well. Add the remaining 1/2 C. olive oil slowly and blend well a final time.
The end result is a delicious, creamy mayonnaise. It's a little thin at first but after it sits in the refrigerator it firms up quite a bit and is just fabulous spread on sandwiches, in dressings, or any other way you choose to use mayo. My particular favorite is for tomato sandwiches.
Friday, April 20, 2012
basilmania
![]() |
| basil leaves | photo: Paul Goyette |
Yesterday I went to The Arbor Gate nursery and took their Basilmania class. Starring Chef Chris Crowder and Herbal Expert Ann Wheeler it was an information packed event.
It turns out that there are a vast number of different varieties of basil. According to Ann there are 64 native species of basil, however we now have hundreds of varieties because it is a "promiscuous cross polinator." I also learned that pepper basil is the only one which does well in the shade. Three years ago I was given a gift of pepper basil from my friend Paula and it has indeed done well on the shadier west side of my house. Now, due to rather mild winters, it's still going strong. And it does indeed taste like a pepper plant. The one basil which I was really taken with while at the nursery was the lime basil. It is so powerfully fragrant and the leaves so deliciously citrus-y that I kept wanting to nibble at it.
In addition to talking about basil, there were demonstrations of different recipes using it. Recipes mentioned included adding basil to tartelettes, a bellini, a vegetable mousse and more. Here's one recipe created by Chef Chris Crowder from The Arbor Gate website:
Frozen Basil Strawberry Mousse
2 tablespoons roughly chopped fresh basil
1/4 cup sugar plus 1/3 cup
3 cups quartered strawberries
1 1/4 cups heavy cream
1 tablespoon fresh lemon juice
1 (1/4-ounce) envelope unflavored gelatin, or 1 tablespoon unflavored gelatin
1/3 cup sliced strawberries, for garnish
1 tablespoon chiffonade of fresh basil, for garnish
Process the basil and the 1/2 cup sugar in a blender or small food processor and pulse until combined, stopping to scrape down the sides as needed. Place quartered strawberries in a medium bowl and sprinkle with the basil sugar. Allow the mixture to stand for 20 minutes.
Cut parchment paper into 5 long strips, about 2-inches wide and 12-inches long. Wrap one strip of parchment around the top of a 3-ounce ramekin and secure with string or tape to form a collar that extends above the top of the ramekin. Repeat with the remaining 4 strips and ramekins. Set aside.
Whip the heavy cream until soft peaks form and refrigerate until ready to use.
Combine the lemon juice with 3 tablespoons of water and the gelatin in a small bowl. Allow gelatin to soften, about 5 minutes. Place the macerated berries and sugar in a blender or food processor and puree until smooth. Pour mixture through a fine-mesh strainer and press to release the juices; you will need about 1 1/4 cups of the strained juice. Discard the pulp and seeds.
In a small, heavy saucepan, combine 1/4 cup of the strawberry puree and the 1/3 cup sugar over medium heat, stirring to dissolve the sugar. Just before the mixture begins to boil, remove the syrup from the heat and stir in the gelatin mixture until well incorporated and dissolved.
Combine the gelatin mixture with the remaining strawberry puree in a medium bowl. Set the medium bowl inside a large bowl filled with ice water. Stir the strawberry mixture until cooled and syrupy.
Fold the reserved whipped cream into the syrup mixture, gently but thoroughly, until well incorporated and the mixture is one solid color. Fill the prepared molds with the strawberry mousse, cover, and freeze until firm, at least 4 hours.
Allow mousse to stand at room temperature for about 10 minutes before serving. Remove the parchment paper from the molds and garnish with fresh sliced strawberries and basil.
However you pronounce it (and whether you think it's an -erb or a herb) basil is a delicious plant which definitely deserves to be made into more than just pesto.
Monday, February 13, 2012
on my mind monday - 2.13.12
![]() |
| in the news | photo: mconnors |
Cocoa can be the new cranberry - according to this article there are some studies that have promising results for it's antioxidant flavanols. While I do believe that there is quite probably some health benefits this emerging claim needs to be approached with caution. Firstly the studies are all being done by major chocolate companies, especially Callebaut, one of the world's largest confectionery producers (formerly Belgian, now Swiss-owned). Any study done by a company that has a vested interest in it's end results needs to be examined more stringently in order to avoid any potential bias. Secondly, even if cocoa does have major health benefits that is for cocoa. The raw product. This does not cover chocolate products that are made from a cocoa base. Unfortunately I have visions of Cocoa Rice Krispies trumpeting major health claims on the front of the box if these studies are proven scientifically valid. So while I will be watching and reading further about this I am advocating that this news be taken cautiously and not as an excuse to add processed cocoa to the diet with abandon.
Potatoes may offer blood pressure benefit - the caveat here is that this refers to purple potatoes. My personal bias against this article is that it refers to potatoes simply as a vegetable. In my practice I have gotten into the habit of labeling types of vegetables so that people understand that not all vegetables are equal. Potatoes are a starchy vegetable, there are also crunchy vegetables and leafy vegetables, etc. Limiting starchy vegetables in our diet makes sense, if only to encourage people to eat a wider variety of vegetables. A little research reveals that purple laver (a type of seaweed) also has anti-hypertensive qualities, as did purple carrot juice. This all seems to suggest that anthocyanins, the substance responsible for that purplish-red pigment, may be responsible. Should the news media start to promote this and someone begins to manufacture anthocyanin-only pills I'd like to the be the first one to tell you to get your anthocyanins through your food.
Can fermented foods make you healthier - in a word, yes. We don't eat enough of these in our modern diet. We've gotten away from traditionally lacto-fermented foods. We think the saurkraut and pickles that we buy in the grocery store are good for us. Unfortunately they are not the types of foods that we need to be eating. Pickles especially are often laden with artificial colors (yup....read the label). And these foods are made using commercial vinegar, not a culture or a whey to ferment naturally. I agree that we need to eat more fermented foods in our diet; I would include kefir, kombucha, and kvass in this mixture for those who like those foods. Want to make your own fermented food at home? It's very easy...here's a great lacto-fermented saurkraut recipe with pictures.
Thirteen (plus) years of asparagus - I love asparagus. I planted some in my garden. This will only be it's second year so we need to harvest with caution (it takes three years for an asparagus garden to be fully functional - or so they tell me). But I continue to read asparagus recipes and drool for the day that I can plunder with abandon and eat our fill of the tasty stalks. Of course that's if there is any left. The little heads have started poking above ground and I've discovered that I made a vital error. When we have asparagus in our house we cut off the ends. Most of them go into the compost heap. A few we feed to the dogs, giggling as we watch them leap into the air to get these tasty-to-them tidbits and chomp down. Guess what? Turns out with their highly sensitive noses they've discovered that the tasty treats also grow in the backyard. Not only that, they're *much* yummier as young tender tops. ::sigh:: Now to figure out how to protect the asparagus garden from the dogs so that we have some to eat for ourselves.
Chocolate orange macaroons - I love macaroons, they're one of my favorite treats. I often don't take the time to make them though. But this recipe from Bauman College is enough to make me change my mind. The combination of orange and chocolate is one of my favorites. Add in that it's in the form of a macaroon cookie? I'm in.
What I'm reading? Digestive Wellness: Strengthen the Immune System and Prevent Disease Through Healthy Digestion, Fourth Edition
I greatly admire Liz Lipski and this, her latest edition of this book, is a great book when it comes to understanding digestive health and it's relationship to overall well-being.
disclosure: cmp.ly/5
Wednesday, February 8, 2012
meatball soup
| meatball soup |
It came out well, very tasty, easy to make and certainly a great way to use up leftovers. I often joke that instead of the kitchen shows where the chef-contestants have access to a kitchen with every ingredient imaginable, there needs to be a cooking show where you have a refrigerator full of leftovers and a traditionally stocked pantry. I'm not sure what anyone else would have made with my ingredients on hand; this is what I came up with.
Meatball Soup
1 medium onion, diced
1 clove garlic, minced
2 tablespoons olive oil
1 cup of celery (mostly greens), diced
8 large cabbage leaves, shredded
1/2 sweet bell pepper, diced
4 cups chicken broth
2 cups water
meatballs (see recipe below)
1 cup cooked rice
sea salt and fresh ground pepper to taste
Heat olive oil in a large stock pot
Saute onion until just starting to wilt
Add garlic and saute one more minute
Add celery and cabbage greens and saute two minutes
Add bell pepper and saute one minute
Add broth and water
Bring to just under boiling then reduce to a simmer
Gently spoon meatballs into soup
Cook 20 minutes or until meatballs are done
Add rice, salt and pepper and serve
Meatballs
These are my basic meatballs. I use this recipe for all of my meatball dishes, Swedish, Hawaiian, crockpot, spaghetti, grinders, this is my go to recipe. There are no breadcrumbs in this recipe and we really don't miss them. The mixture comes out a little gloppy at first but the meatballs are tender and juicy which is just the way we like them.
1 pound organic ground meat
1 egg
1 tablespoon dried onion
1 tablespoon dried parsley
1/2 teaspoon dried oregano
1/2 teaspoon salt
Mix ingredients together and form into meatballs
Bake in 350F oven for 20 minutes or until cooked through
Wednesday, February 1, 2012
mediterranean rice salad
Recently I went to a party and I needed to bring a dish to share. The food theme of the evening was Mediterranean. Wanting to make something fresh and different (and more than just the typical hummus and pita or a Greek salad) I rummaged around in my pantry and put together this amazingly delicious rice salad. One of the great things about this dish is that it makes use of fresh vegetables and fresh herbs. I love salads like this, often preferring them the next day after the flavors have had a chance to meld and blend.
It was a big hit at the party and my family was rather disappointed that I didn't bring home more leftovers. I got two thumbs up from the kids (my personal taste testers) and they told me that I should definitely make it again.
Mediterranean Rice Salad
1 cup cherry tomatoes, quartered
1 red sweet bell pepper seeded and diced
4 spring onions, diced
3 ribs celery, diced
1 cup assorted olives, diced
1/4 cup sun dried tomatoes in oil, drained and diced
1/2 cup pine nuts
1 bunch parsley, de-stemmed* and minced
1tablespoon minced basil leaves
4 cups cooked basmati rice
2 tablespoons olive oil
1 tablespoon red wine vinegar
sea salt and fresh ground pepper to taste
Mix all ingredients together, toss well, let sit 2-3 hours for flavors to develop.
Delicious!
*When I de-stem herbs like parsley or cilantro I've learned a little trick that makes it very easy:
Leave the herbs bound together, wash well to clean and shake dry
Holding the stems use a chef's knife and chop at the leaves in a short brisk fashion moving down the stems
Rotate the stems and repeat on another side until all sides have been shaved
Remove band holding the stems together
Throw the stems in your compost bin
Pile chopped leaves together and mince
It probably took longer to write that than it takes to do it. Once you do this you'll wonder why you ever de-stemmed leafy herbs any other way.
It was a big hit at the party and my family was rather disappointed that I didn't bring home more leftovers. I got two thumbs up from the kids (my personal taste testers) and they told me that I should definitely make it again.
Mediterranean Rice Salad
1 cup cherry tomatoes, quartered
1 red sweet bell pepper seeded and diced
4 spring onions, diced
3 ribs celery, diced
1 cup assorted olives, diced
1/4 cup sun dried tomatoes in oil, drained and diced
1/2 cup pine nuts
1 bunch parsley, de-stemmed* and minced
1tablespoon minced basil leaves
4 cups cooked basmati rice
2 tablespoons olive oil
1 tablespoon red wine vinegar
sea salt and fresh ground pepper to taste
Mix all ingredients together, toss well, let sit 2-3 hours for flavors to develop.
Delicious!
*When I de-stem herbs like parsley or cilantro I've learned a little trick that makes it very easy:
Leave the herbs bound together, wash well to clean and shake dry
Holding the stems use a chef's knife and chop at the leaves in a short brisk fashion moving down the stems
Rotate the stems and repeat on another side until all sides have been shaved
Remove band holding the stems together
Throw the stems in your compost bin
Pile chopped leaves together and mince
It probably took longer to write that than it takes to do it. Once you do this you'll wonder why you ever de-stemmed leafy herbs any other way.
Labels:
flexitarian,
recipes,
vegan,
vegetables,
vegetarian,
wwme
Wednesday, January 11, 2012
twitter party #foodrevparty
As I said...it was a busy night. I actually managed to participate in two twitter parties with the second one based on Jamie Oliver's Food Revolution. The topic of the evening was Winter Seasonal Foods. This was a great topic; I love seasonal eating. We try pretty hard to eat seasonal foods in our home for two reasons. First, if it's seasonal it's often local, and that means fully ripe, fresh, and much more tasty. The other is that it keeps our taste buds and food sensibilities engaged. If you can only have strawberries when they are local and in season you sure appreciate them a whole lot more than when you buy them year round. I often find that out of season produce looks beautiful only to discover that it somehow doesn't smell or taste right.
This is an overview of an hour of fast and furious typing by a LOT of people. There are some really great ideas here about how to incorporate seasonal eating into your nutritional plan. Hopefully these suggestions will help you add more seasonal foods to your menu. I only list the first question here as the others all seemed to keep circling back to the idea of recipes, and food suggestions. There's a brief synopsis of the other questions at the end.
Winter is here for most of us, which brings new meal challenges. What seasonal foods are readily available in your area? The answers seemed to be pretty consistent (with the exception of at least one participant who lives in a tropical climate and so has no distinct tropical variation), most people talked about winter squashes, cabbages, sweet potatoes, some mention of root crops and some citrus. Recipe suggestions were great and I encourage you to use any and all of these:
This is an overview of an hour of fast and furious typing by a LOT of people. There are some really great ideas here about how to incorporate seasonal eating into your nutritional plan. Hopefully these suggestions will help you add more seasonal foods to your menu. I only list the first question here as the others all seemed to keep circling back to the idea of recipes, and food suggestions. There's a brief synopsis of the other questions at the end.
Winter is here for most of us, which brings new meal challenges. What seasonal foods are readily available in your area? The answers seemed to be pretty consistent (with the exception of at least one participant who lives in a tropical climate and so has no distinct tropical variation), most people talked about winter squashes, cabbages, sweet potatoes, some mention of root crops and some citrus. Recipe suggestions were great and I encourage you to use any and all of these:
- parsnips in spaghetti sauce - I plan to try this
- oven roasted butternut squash fries
- butternut squash soup
- grilled butternut squash
- using butternut for vegetarian soup base
- braised squash with lemongrass
- butternut squash salad with raisins and ginger
- risotto with winter squash and wild mushrooms
- kale chips (love these!)
- fermented cabbage (here's a great recipe from Nourished Kitchen)
- fermented carrots (another great recipe from Nourished Kitchen)
- use spaghetti squash or sauteed shredded cabbage instead of pasta
- using cranberries to make whole-cran-lemonade
- using cranberries for smoothies
- baby carrots roasted with rosemary
- roasted vegetables with herbs, acid (vinegar, lemon, etc) and olive oil
- growing herbs indoors all year round for fresh seasonal flavor
Discussion continued with talk about the use of Farmer's Markets, CSA's, and the use of freezers, canning/preserving, and dehydrating as a way to deal with an abundance of seasonal produce. These were seen as a great way to obtain seasonal foods. After all, and I believe it's true for most people, if you're going to go to the trouble of obtaining and eating food that is specifically in season, you probably also want to get food that is as local as possible. And if you have more than you can eat, you're smart to want to save some for a later time by preserving it through one means or another.
As the evening began to wind down the topic turned to cocktails. Specifically pumpkin martinis. Not sure that's going to be on my #gottatryit list. However I am really glad to have some new, wonderful ideas for recipes that all rely on the bounty of winter produce. The discussion of how to obtain produce from various sources year round reminds me to always be aware and alert for opportunities to source locally, seasonally, and, most important, to try to get to know my farmers. And the discussion of dehydrators reminded me that I need to learn more about how to use mine and to be more consistent in it's use.
Wednesday, January 4, 2012
pie crust
It's the holidays and that usually means pie season. That, truth be told, is something I dread. I'm not very good at making pies. Let me amend that. I'm pretty good at the filling, as a matter of fact I make a mean coconut custard, but the crust? Well that's a different story. For years I have struggled, mumbled under my breath and cursed as I patched together yet another sorry looking crust.
In olden days, before I got the gospel of whole food nutrition, I would "cheat" and buy my pie crusts at the grocery store. That, my friends, is no longer an option. It's not the lard that I object to, it's the BHT, the artificial colors (!), and more often than not the partially hydrogenated ingredients (read trans fats). These do not need to be in a pie crust and most certainly do not need to be in your body.
I am thrilled to announce that I have discovered the secret to a fabulous pie crust. I know it may sound silly to be so happy about this but believe me, several decades of ugly pies later I'm amazed at how well this worked out. I'm so excited about this that I cannot wait to share it with you. I made an extra batch just to be sure it works and turned it into pie crust cookies. (Admittedly not high on the healthy item list but a treat nonetheless.)
That lovely picture is an amazingly beautiful pie crust made in my cuisinart. Apparently this method was developed by Julia Child. Rolled out between two sheets of wax paper it does not crumble, fall apart, or need patching. I'm seriously tempted to write out the recipe and tape it permanently to the side of my cuisinart so I always know where it is.
My next experiment will be to see if it works with gluten free flours. Since pastry flour is supposed to be low in gluten anyway (we don't want it rising while the pie is baking) I think this should be a fairly simple translation. I'll keep you posted the next time I need to make a pie.
Without further ado, here is the recipe for the pie crust and one for pie crust cookies.
Julia Child's Cuisinart Pie Crust
1 3/4 cup of flour
1 stick butter, cut up
3 tablespoons vegetable oil (I used walnut, it was delicious)
1 teaspoon salt
Blend flour, butter, oil and salt in cuisinart until crumbly
Add 1/4 cup cold water and blend until it forms a ball
Makes two crusts
Pie Crust Cookies
One rolled out pie crust
2-3 tablespoons melted butter
Cinnamon sugar to taste (I use 1 teaspoon cinnamon to 7 teaspoons evaporated cane juice crystals)
Preheat oven to 350 F
Brush pie crust with melted butter covering thoroughly
Dust according to taste with cinnamon sugar
Cut either using cookie cutters or into strips
If making strips twist them before placing on lightly greased cookie sheet
Bake 8-10 minutes until golden brown
Let cool completely before eating
In olden days, before I got the gospel of whole food nutrition, I would "cheat" and buy my pie crusts at the grocery store. That, my friends, is no longer an option. It's not the lard that I object to, it's the BHT, the artificial colors (!), and more often than not the partially hydrogenated ingredients (read trans fats). These do not need to be in a pie crust and most certainly do not need to be in your body.
I am thrilled to announce that I have discovered the secret to a fabulous pie crust. I know it may sound silly to be so happy about this but believe me, several decades of ugly pies later I'm amazed at how well this worked out. I'm so excited about this that I cannot wait to share it with you. I made an extra batch just to be sure it works and turned it into pie crust cookies. (Admittedly not high on the healthy item list but a treat nonetheless.)
That lovely picture is an amazingly beautiful pie crust made in my cuisinart. Apparently this method was developed by Julia Child. Rolled out between two sheets of wax paper it does not crumble, fall apart, or need patching. I'm seriously tempted to write out the recipe and tape it permanently to the side of my cuisinart so I always know where it is.
My next experiment will be to see if it works with gluten free flours. Since pastry flour is supposed to be low in gluten anyway (we don't want it rising while the pie is baking) I think this should be a fairly simple translation. I'll keep you posted the next time I need to make a pie.
Without further ado, here is the recipe for the pie crust and one for pie crust cookies.
Julia Child's Cuisinart Pie Crust
1 3/4 cup of flour
1 stick butter, cut up
3 tablespoons vegetable oil (I used walnut, it was delicious)
1 teaspoon salt
Blend flour, butter, oil and salt in cuisinart until crumbly
Add 1/4 cup cold water and blend until it forms a ball
Makes two crusts
Pie Crust Cookies
One rolled out pie crust
2-3 tablespoons melted butter
Cinnamon sugar to taste (I use 1 teaspoon cinnamon to 7 teaspoons evaporated cane juice crystals)
Preheat oven to 350 F
Brush pie crust with melted butter covering thoroughly
Dust according to taste with cinnamon sugar
Cut either using cookie cutters or into strips
If making strips twist them before placing on lightly greased cookie sheet
Bake 8-10 minutes until golden brown
Let cool completely before eating
Friday, December 30, 2011
joy bauer's food cures
Joy Bauer's Food Cures has been revised and updated; I was fortunate enough to have a copy recently come across my desk.
As those of you reading my blog know, I am a huge proponent of food and it's ability to help support a healthy body. We are what we eat; eating whole food and practicing wholesome nutrition goes a long way toward supporting our bodies and in dealing with health issues.
Broken down into several easy to understand categories this book covers the basics of understanding nutrition as well as how to, as Joy puts it, "think like a nutritionist." She offers information about how to lose weight and support healthy skin and hair.
Speaking of hair, did you know the average person loses about 100 hairs each day? It turns out that since hair is made from protein if we don't get enough we can actually cause the rate of new hair growth to slow down. In the book Joy points out that hair is a good way to determine overall health and highlights which vitamins (and which foods contain those vitamins) are supportive for healthy hair and nails (which are made from the same hardened keratin protein as hair). Offering more in-depth health and nutrition support, the book also delves into conditions such as cardiovascular disease, diabetes, migraines, IBS and more.
The book is easy-to-read and laid out with step-by-step encouragement and support to help the reader reach their goals for health. The book is also sprinkled with lots of call-out boxes which cover the highlights and answer questions that the reader may have. She includes stories and examples throughout the book which is helpful. In addition to providing the necessary information to help the reader better understand the basics of their condition and how to best support their body each chapter has a 4-Step Program which reminds the reader of the basics, provides a grocery list, offers some additional suggestions, and then also offers meal plans with some delicious looking recipes. Her Citrus Smooth-See recipe on page 272 is delicious as is the Vegetable Oatmeal Bisque on page 322. And the Parmesan Couscous and Ratatouille with Olives, Tomatoes and Fresh Basil on pages 383 (listed below) is a new family favorite.
Joy Bauer's Food Cures provides what you need to know about healthy eating and whole food nutrition. It also gives you information to help you understand how to make those healthy changes.
Parmesan Couscous and Ratatouille With Olives, Tomatoes, and Fresh Basil
Makes 3 servings (1 1/2 cups ratatouille and 1 1/2 cups coucous per serving
Ratatouille
1/2 pound kale, stems trimmed, thinly sliced
Kosher salt
1 tablespoon olive oil
1 large yellow squash, cut into small cubes (about 2 cups)
2 medium tomatoes, diced
1/4 cups kalamata or nicoise olives (7 or 8) pitted and chopped
Pinch of ground red papper
1/4 cup whole basil leaves torn
Couscous
1 cup whole wheat couscous
1 cup sugar snap peas, chopped
1 1/4 cups low sodium chicken or vegetable broth, heated
1/2 cup grated Parmesan cheese
Kosher salt
Ground black pepper
To make the ratatouille:
Heat a deep saute pan over high heat
Add the kale, a sprinkle of salt, and 3/4 cup water
Cook, stirring occasionally for 13-15 minutes or until softened
If the kale becomes too dry add more water
Stir in the oil, squash, tomatoes, olives, and red pepper
Cook for 5-6 minutes or until the squash is tender and the tomatoes lose their shape
Remove from the heat and stir in the basil
Set aside
To make the couscous:
In a medium bowl, mix the couscous and sugar snap peas
Pour the hot broth on top, stir at once and cover with aluminum foil
Allow the couscous to rest for 5-6 minutes or until all the water is absorbed and the couscous is soft and fluffy
Fold the cheese into the couscous and season with salt and black pepper
To serve:
Spoon the couscous onto a plate or bowl and serve the ratatouille on top
To learn more about Joy and the concept of food cures visit her website.
Disclosure: cmp.ly/1, cmp.ly/5
Subscribe to:
Posts (Atom)