Showing posts with label baking. Show all posts

Sunday, November 13, 2011

baking mishaps

A lesson in humility... Just a week ago I posted a recipe for lemon millet muffins.  I was so happy with how the recipe came together the first time.  Often that doesn't happen.  This next effort clearly demonstrates that.

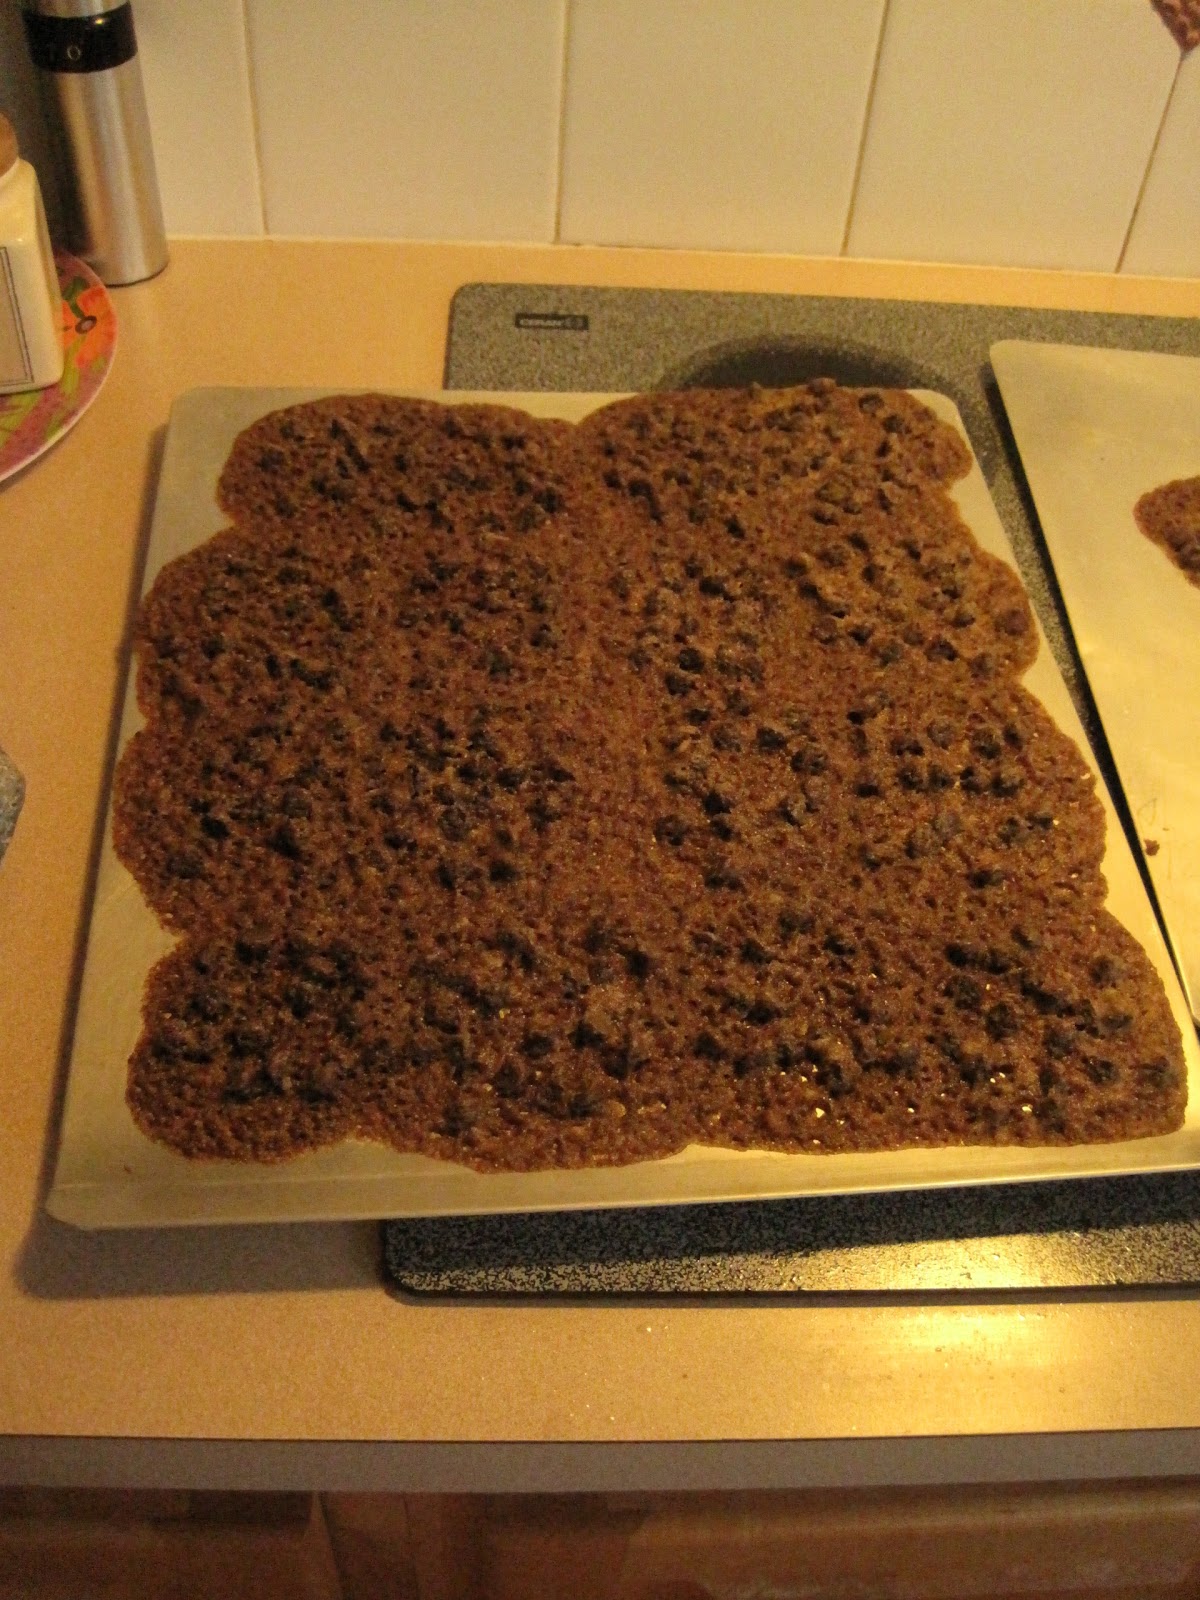
I wanted to make cookies.  The family has been requesting chocolate chip for a while and I've been experimenting with lots of other types, peanut butter, oatmeal raisin, snickerdoodles, etc, that I decided the time had come to make chocolate chip cookies.  Never content to just pick a tried-and-true recipe I wanted to make gluten free, dairy free, egg free chocolate chip cookies.

The picture shows that it was less than successful.  I will share that they taste great but they don't look so hot.  The biggest concern is what will happen when they cool.  In my experience if they spread this much they are often inedible when no longer warm.  We'll see how it goes.

And it goes without saying that this particular recipe is not exactly ready for prime time.

Wednesday, November 9, 2011

olive oil cranberry bundt cake

harvesting cranberries | photo: jkb
I love the tasty tartness of cranberries and every year I look forward to the fresh ones available in the grocery store.  I confess to being somewhat jealous of my brother and sister-in-law who live in Massachusetts near a cranberry bog.  Not only is it picturesque, it produces loads of these lovely berries, one of the few native fruits we have in this country.

Most people tend to eat cranberries either as canned jelly or as craisins.  But they're so much more versatile than that.  During the holiday season I make my own cranberry orange relish and love a dollop of it in my morning oatmeal in the winter.  Even more than that I love it in this bundt cake.  I've lost the original source for this recipe over the years but I remember learning about olive oil bundt cakes years ago and being amazed at the thought of olive oil in a cake.  When I discovered how moist the cake was, even days later, I was hooked.  Tinkering with the recipe over the years this is the final version that I came up with.  It's a tasty recipe and I always look forward to making it when fresh cranberries are in season.*

Olive Oil Cranberry Bundt Cake

6 egg whites
1 1/2 cups evaporated cane juice crystals
3/4 cup extra virgin cold pressed olive oil
1 cup white whole wheat flour
1 cup all purpose flour
1 teaspoon baking soda
1 teaspoon salt
1 teaspoon ground cinnamon
1/2 teaspoon ground nutmeg
1 cup organic buttermilk
2 cups chopped fresh cranberries
2 tablespoons orange zest

Preheat oven to 350 degrees F
Butter a 9 inch bundt pan and dust with flour
In a bowl, beat the egg whites until stiff
Beat in the cane juice crystals until fluffy
Mix in the olive oil
In a separate bowl, mix the flour, baking soda, salt, cinnamon, and nutmeg
Alternately mix the egg white mixture and the buttermilk into the flour mixture until smooth
Fold in the cranberries and orange zest
Transfer the mixture to the prepared Bundt pan
Bake 1 hour in the preheated oven, until a knife inserted in the cake comes out clean

Note:  this cake can also be made with blueberries instead of cranberries, simply omit the cinnamon 
          and nutmeg.

If desired make a simple orange juice glaze:

1 cup evaporated cane juice crystals
1/4 cup orange juice

blend the cane juice crystals in a blender until finer and more powdery
whisk together with orange juice


*don't forget to buy extra bags of cranberries, they freeze very well

Monday, November 7, 2011

gluten free lemon muffins

lemons | photo: Fir0002/Flagstaffotos
I needed to make something to bring to an event that I was attending recently.  Knowing that the hostess was sensitive to gluten and dairy I wanted to make sure that I made something that fit her nutritional plan.  Casting around for ideas I spied a pile of fresh lemons that I had recently purchased (they were on sale) in the fruit bowl.

I love lemon muffins, they are so tasty and yet,  I'm not sure why,  they don't often make an appearance.  I wanted my muffins to have a little crunch to them so I decided to add some millet which would give a slight pop when eaten.  I started with coconut oil and sucanat (no dairy means no butter), added a couple of eggs and the zest of one lemon.  While I was at it I juiced the lemon, strained the juice, put it in a measuring cup and then added almond milk (again no dairy) so that it would curdle and thicken a little.  I then began to add the dry ingredients.  After adding the curdled milk I tasted the mixture and decided it needed just a pinch more sweetener.

I made this in mini-muffin tins and got three dozen.  They were well received at the event, all of them were eaten and I even got requests for the recipe.

I often play with a recipe multiple times before it's ready for prime time, but this one seemed to come together really well so I'm sharing it as is.  Enjoy.

Lemon Millet Muffins

1/2 cup coconut oil
1 cup sucanat
1/2 cup evaporated cane juice crystals
1 lemon
2 eggs
1/2 cup almond milk, approximately
1 cup gluten free flour mix (I used oat, rice, buckwheat, tapioca)
1/4 cup fresh ground flax seeds
1/4 cup (heaping) millet seeds
1 teaspoon baking soda
1/2 teaspoon sea salt

Preheat oven to 350 F
Grease three mini-muffin pans (or one regular muffin pan)
Zest the lemon
Juice the lemon and put juice into a measuring cup
Add almond milk until there is 2/3 cup liquid
Beat together coconut oil and sugars until fully combined
Add eggs, one at a time until well mixed
Add lemon zest, baking soda, and the salt
Alternate adding flour and curdled milk, making sure they are well mixed
Spoon by tablespoonfuls into muffin cups
Bake 15 minutes
Let cool 2 minutes in the pan
Finish cooling on a wire rack

Sunday, September 25, 2011

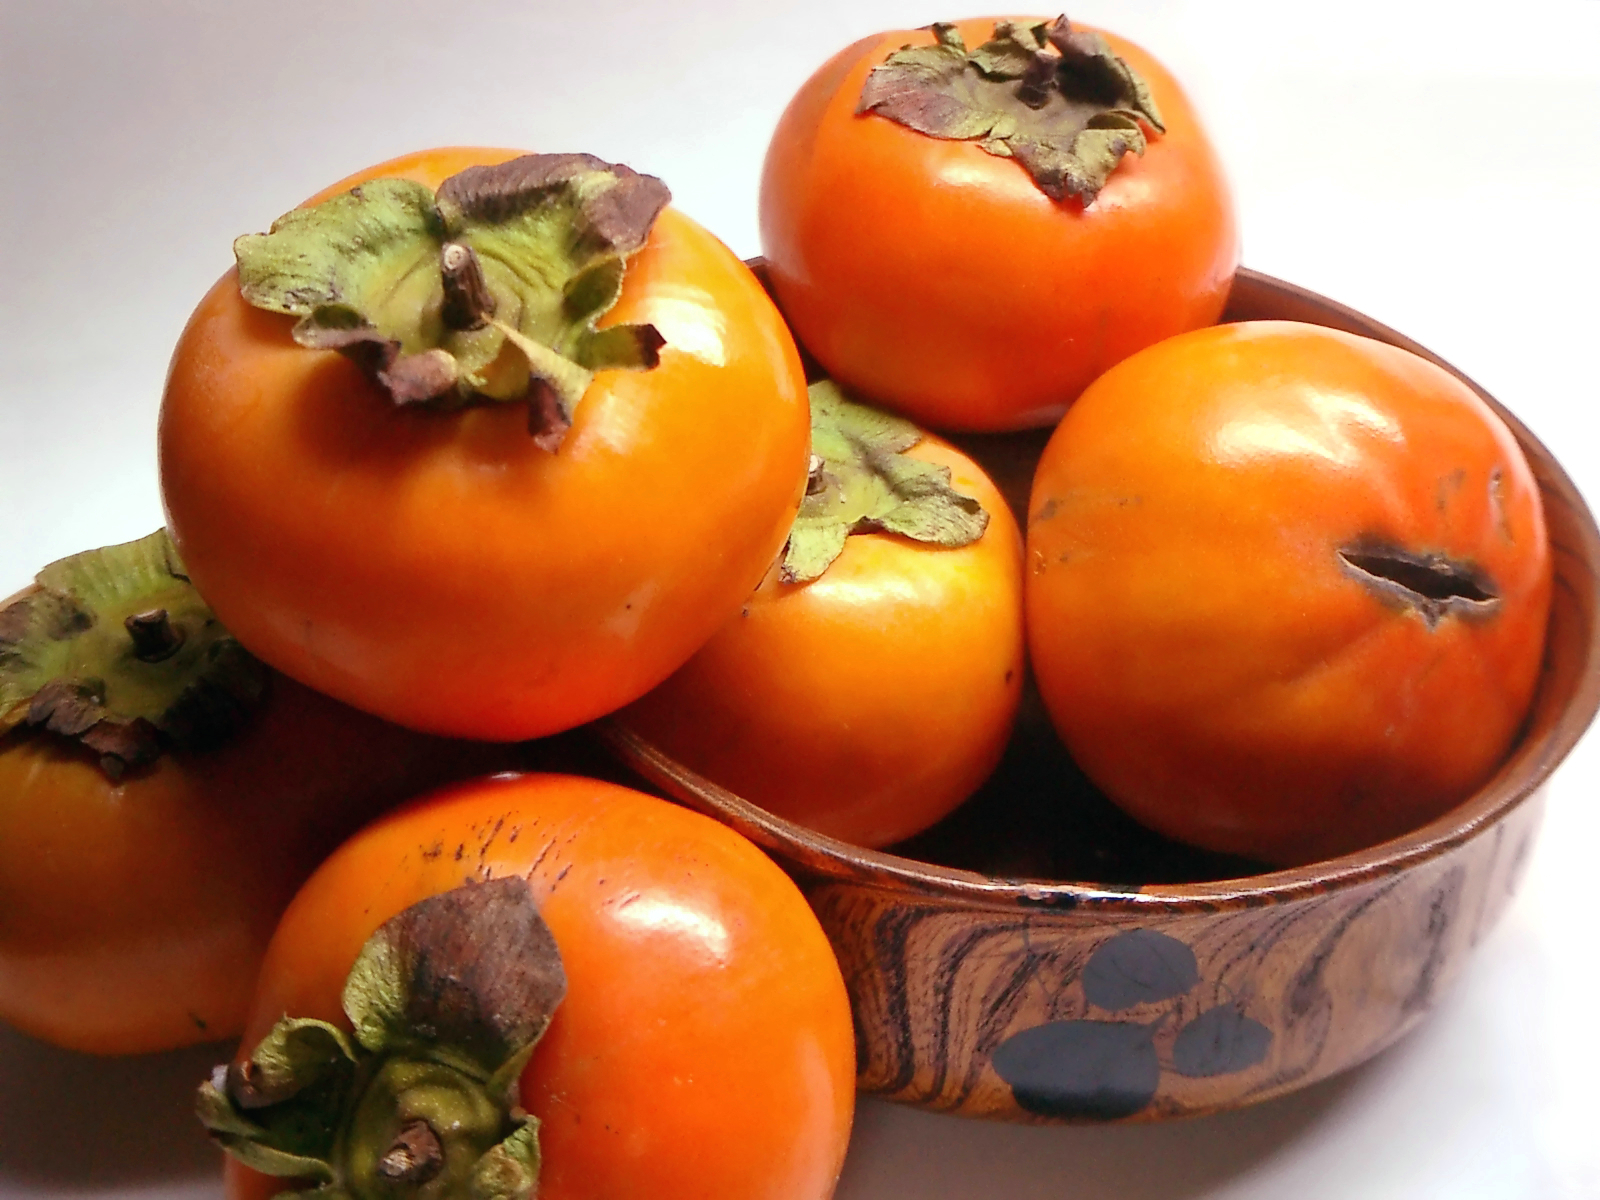
persimmon raisin muffins

Persimmons | photo: Tomomarusan
It's persimmon season.  I love these tasty little fruits, with their rich fragrant scent and amazing flavor.  Luckily for me there is a pick your own place not too far away.  Each year I go and pick pounds and pounds of them.  I eat as many as I can before they get so ripe and so soft that they are in danger of sliding out of the fruit bowl and off the counter.  They have to be pretty soft before they are ripe enough to eat so this window is pretty small.

When I get to this point I turn the rest into pulp to store in the freezer.  This allows me to make cakes, cookies, and other persimmon delights for as long as the supply lasts. Apparently you can make jam from persimmons but I somehow never seem to get around to doing that.  I'm also not sure if I would use it as I'm currently the only one in the house who likes persimmons.

One of my favorite things to bake with persimmons are these muffins.  They're a great treat with a rich dark flavor that is so reminiscent of the crisp fall weather.  I'm sure they would freeze well but somehow they've never lasted long enough for me to test that theory.

Persimmon Raisin Muffins

3 cups white whole wheat flour
1 teaspoon cinnamon
1/2 teaspoon nutmeg
1 teaspoon baking soda
½ teaspoon baking powder
1 teaspoon sea salt
1 cup persimmon pulp
1 egg
1 cup sucanat
1 tablespoon vanilla
1 cup raisins
1 cup chopped pecans

Preheat oven to 375°F
Grease loaf pans
Sift together flour, cinnamon, nutmeg, baking soda, baking powder and salt
In a separate bowl beat egg, add persimmon pulp and sucanat
Add vanilla, raisins and pecans
Add sifted ingredients and mix well
Spoon into greased muffin tins
Bake 15 minutes or until tops spring back when tapped
Remove from oven and cool in tins 3-4 minutes before moving to wire rack
Finish cooling on wire rack

Tuesday, December 21, 2010

gluten free cookie fun

Walking into The G's Healthy Gourmet with a couple of borrowed kids I am greeted by the sounds of Christmas carols playing over the speakers and the sight of children rolling dough and sprinkling flour.  Tiffany, the Pastry Chef, and her husband, Nick, the Executive Chef at The G's, greet us at the door.   We settle at a table while Tiffany brings us our supplies...rolling pins, a block of cookie dough, a bowl of her own specialty gluten-free flour, cookie cutters, milk (because what goes better with cookies than milk?) and a plate of cookies to munch on while we are working.

Rolling out the slightly cold dough and pressing the cutters into it is a lot of fun for the kids.  It's hard to get the cold dough started, the adults help get things going.  Some of the children seem to really like the idea of flouring the table, the rolling pin, the dough, the floor; Tiffany assures the adult guests that they have someone coming in to clean up after the event is over.  Rolling, cutting, reshaping and re-rolling the dough, the kids are having a lot of fun.  Excitedly chattering away about the choices of cookie cutters they are using the children quickly fill up their baking trays.  After getting each child to initial their parchment paper lined tray Tiffany and Eric, her assistant, take the cookies back into the kitchen and slide them into the oven.


Ten long agonizing minutes.  Waiting and waiting for those cookies to come out of the oven.  Playing with flour.  Making shapes out of left over dough.  Is it ten minutes yet?  Are the cookies ready yet?

Then the wait is over and the warm cookies arrive.  A pretty pile of holiday shapes all waiting for their final transformation.  With them come bowls of fluffy frosting (a serious temptation for little fingers), parchment paper frosting-filled bags and the excitement of creating a masterpiece.

It was clearly obvious that everyone, kids, parents, the folks at The G's, had a good time.  Each child went home with their cookies carefully placed into a stack of take-out boxes, proudly carrying the haul of their handmade creations.  What a  sweet way to start the holiday season.

Saturday, November 27, 2010

gluten-free holiday gift giving

The holidays are approaching.  Gluten and those with gluten sensitivity or celiac disease have gotten a lot of publicity lately.  There are lots of gluten-free items on the grocery store shelves, there are articles in the news, there are restaurants proclaiming that they have gluten-free items.

Apologies in advance for the advertorial nature of this post, however I've gotten quite a few questions about what to give to folks who need to switch to a gluten-free lifestyle or who know someone who has to deal with this issue.  After writing practically the same email a number of times I've realized that there are probably others out there who have the same question so I'm putting it out on the blog.

While I'm not a gift-giving expert there are a few things that come to mind; items that I think anyone following that lifestyle would be happy to have on their gift list.  I'd like to start by sharing a column that I recently wrote for the Woodlands Family Magazine about gluten-free living.  Admittedly the information is geared toward those who live in The Woodlands, but the information about gluten-free living holds true for anyone.  And many of the grocery stores and restaurants are chains so you may be able to find one near you that can accommodate your needs or the needs of your loved ones.

I do not have any affiliation with any of the products listed below, however they are linked through Amazon and I do receive a few cents if you purchase through the links I provide.

One of the best gifts that I think you can offer someone is a bread machine.  Making bread by hand is wonderful and I love doing it.  But I realize that for many folks this just does not fit into their busy modern lives.  The Breadman is a great machine and I will actually be giving this as a gift this year.  If you have more dollars to spend I have several friends who use a Zojirushi and they love it.

A great thing about a bread machine is how simple it is to use.  Put the ingredients in, push a button, walk away and a few hours later you have fresh bread.  If you are making specialty breads a bread machine is great; it will allow you to thoroughly knead the dough, then pull it out to shape, and bake in a conventional fashion.  This is wonderful for rolls, baguettes, pizza and all sorts of other wonderful treats.

There are a couple of not-to-be-missed gluten-free cookbooks:


These are cookbooks that I own, love and use a lot.  The great thing about these books is that they give you an amazing amount of great information to help you or your loved one learn what they need to know to make the transition to gluten-free living.  They very clearly explain how folks, can live happy, healthy and gluten-free.  I actually feel they're a great choice not only for those who must live gluten-free but those who want to be able to bake and cook for them.  Even if you don't have to avoid gluten, if you have someone in your life who does, these books make it easy to understand what works for that lifestyle.

There are a couple of other books on my personal wish-list that I feel are worth mentioning here:


Another nice thing to do for those on your gift list who need to be gluten-free is to consider giving a gift basket full of gluten-free goodies.  Ingredients that they need for their gluten-free life, or gluten-free mixes that can give them a boost in making delicious treats.


The ingredients that go into gluten-free baking can often be confusing for folks.  Xanthan gum, guar gum, potato or tapioca flour (not starch), nut flours, bean flours.  These are all things that you have to have in your pantry to be able to compensate for the absence of gluten in your baking.


The most important thing to remember is that living gluten-free does not mean you have to be deprived.  There are so many wonderful things that you can eat and so many delicious substitutions that it's really not deprivation, just a different way of doing things.  My friend Claire recently wrote a post about her adventures with gluten-free baking that shows how simple it can be and how delicious.

So enjoy your holidays, with or without gluten, and all that the season has to offer.
Sunday, October 10, 2010

baking with kids

ready, set, bake


Baking is wonderful and something I love to do.  Even more fun is to bake with kids.  They're so excited and fascinated by the process.  Learning their way around the ingredients, how to measure, the wet and dry combining process; it's a fun edible science and math experiment in the kitchen.

This is one of my baking buddies, Miss A.  She came over the other day with her brother, Mr. C.   I had promised them that the next time they came over we would make cookies so that was our plan.

As it turns out Mr. C's idea of making cookies was to allow his sister and I to do all the baking while he played the part of Official Cookie Tester.  And, might I add, he was rather impatient for those cookies to be done.

Miss A and I got down to business, put on our aprons and got out my "Famous Chocolate Chip Oaties" recipe.  Mr. C. wanted to know why they were famous, had they been on t.v.?  Did someone famous invent them?  I told him that it was a recipe I had created and I simply call them Famous because everyone who eats them really likes them and wants more.  Needless to say he was less than impressed and informed me that unless they've been on t.v. they can't be famous.  Maybe I should send a box to Ellen?

One of the things I love about baking with kids is how curious they are.  Miss A wanted to taste everything.  Of course we decided that the chocolate chips were pretty tasty.  Surprisingly she liked the oatmeal, even raw, and requested a large spoonful of her own to nibble on.  We had two kinds of sugar and she tasted both of them.  Then we got to the baking soda.  Miss A asked if she could taste it.  I was a little surprised and said, "I'm not sure you want to do that."
"Why?" she asked.
"Well," I replied "it's a little bitter tasting and I'm not sure you're going to like it."
"But I want to taste everything." she said.
So I let her taste it.
Her face scrunched up a little and she said, "It's not really bitter but I don't like it."
"Want some chocolate chips to wash that down?" I asked.
Of course the answer was yes.

We wound up making two batches of cookies the regular variety and the peanut butter variety.  The recipe is below and we're sure you're going to enjoy it, just like we did.

Famous Chocolate Chip Oaties

1/2 C butter
1 C evaporated cane juice crystals
1 egg
1/2 t. vanilla
1 C + 2 T white whole wheat flour
1/2 t. salt
1/2 t. baking soda
1 C chocolate chips
1 C rolled oats

Preheat oven to 375
Blend together butter and sugar until creamy
Add egg and blend well
Add vanilla and blend well
Mix together flour, salt and baking soda and sift into butter mixture
Blend in chocolate chips
Blend in oats

Drop by spoonfuls onto a greased baking sheet
Bake 10 minutes
Let sit on baking sheet 2 minutes
Move to rack to finish cooling

For the Peanut Butter variety:
Substitute sucanat for the evaporated cane juice crystals
Add 1/2 C chunky peanut butter

Saturday, May 22, 2010

banana oat pancakes

We love pancakes in our house.  They are a great, easy to make, healthy, whole grain breakfast.  Throw in some fresh fruit and maybe a little homemade Greek yogurt and it's the perfect meal to start your day...filling, nutritious, blood-sugar balancing, and, most importantly, delicious.

I love it when I find a recipe that is so perfect it doesn't need anything else.  This recipe is one of them.  From my King Arthur Flour Whole Grain Baking book it's a recipe that is a consistent favorite.  I love the fact that it's made from whole grains.  Although I make my own oat flour by grinding oat groats you can easily make it at home by placing old fashioned oats in the food processor or blender and blending it until it reaches a fine consistency.  If that's more than you are willing to do you can also just buy it, both Arrowhead Mills and Bob's Red Mill sell oat flour or you can get certified gluten-free oat flour from Legacy Valley or Cream Hill Estates.

As a quick side note, oats do not have gluten in them.  However they tend to be grown near, stored with or transported with other glutinous grains, most specifically wheat.  Certified producers grow and process only oats, guaranteeing that there is no cross-contamination.

One of the things that my family likes so much about this recipe is that it is very fluffy.  You don't realize that these are whole grain oat pancakes they are that light and airy.  The bananas combined with the cinnamon and nutmeg make it a delicious way to start your day.  I also like having another great recipe that allows me to use up any almost over-ripe bananas.

King Arthur Flour's Banana-Oat Pancakes

3 small bananas mashed
2 T. unsalted butter melted (use organic)
1 T. lemon juice
1 T. sugar (I reduce this to 1 t. as the bananas when they are this ripe have a lot of natural sugars)
2 eggs
1 C. oat flour
1/2 t. baking soda
1/2 t. salt
1/2 t. ground cinnamon
1/2 t. ground nutmeg

Stir together the mashed bananas, butter, lemon juice and sugar in a medium bowl.
Beat in the eggs.
Whisk together the oat flour, baking soda, salt and spices in a small bowl.
Form a well in the center of the dry ingredients and pour in the wet ingredients.
Stir the batter just until the dry ingredients are thoroughly moistened.
Check to be sure the batter is thin enough for your pancakes; you may need to add a touch of milk or water (I never do)
Let the batter sit 10 minutes before using.

Heat a nonstick griddle or heavy skillet.
If your surface is not non-stick brush it lightly with vegetable oil.
When the surface is ready spoon batter 1/4 C. at a time into the pan.
Let the pancakes cook on the first side until bubbles begin to for around the edges, 3-4 minutes.
When the pancakes are just beginning to set flip then and let them cook on the second side, about 1 1/2 minutes more.

KA suggests you can sprinkle toasted walnuts over the batter just before cooking as an extra treat.

Sources for oat flour:


Monday, May 10, 2010

grinding flour

Claire wrote in and asked, "I have a question re: grinding your own flours out of grains, say brown rice flour, garbanzo bean flour, etc. When you do it, do you soak the grains/beans before you grind it? I soak everything over night (my grains, beans and nuts) before I cook it. I learned this from my Natural Chef class as soaking deactivates the phytic acid that acts as enzyme inhibitors and makes it more digestable. Cooking alone helps to some extent, but not as good as soaking. I am just wondering if I do soak it first, do I need an extra step, say, using a dehydrator to dry it before I grind it.

The reason I'd like to get the model Super 5200 from Vitamix, is that in addition to a wet container that's good for processing wet goods, there is an additional dry container that has a special set of blades that are designed for grinding flours. Then it follows that do I need to also get a dehydrator before I can even grind it?"


I'll start by saying that yes there is another container that can grind grains and beans into flours.  I use a Wondermill which does a great job and can grind to several different levels of fineness.  You cannot grind wet or oily items (flax seeds, wet sprouts, nuts, etc.) in the electric version.


As far as soaking goes there are a few different ways to do it.  The first is to soak, dry (either in a dehydrator or in an oven set to very low temp for a long time) and then grind.  Another is to sprout, dry and then grind.  The picture above shows flour made from sprouted wheat and sprouted spelt; you can see that the texture is no different than if you use the whole grain.  The third is to grind your grains into flour and then soak the flour overnight before using it, this is the method that I use most.  Any of these methods will work well, it's up to you to determine if you want to use the oven method or purchase a dehydrator.


Using fresh ground flour is an excellent idea because many nutrients are stripped out by commercial processing.  Additionally, if you use fresh ground flour you are getting the full benefit of the germ, which is where all of the beneficial oils are.  It is important to note that using fresh ground flour may require a modification to your recipe because the extra fiber can retard the rise of gluten (requiring a longer rise time or the addition of leavening agents such as vital wheat gluten, lecithin, ascorbic acid or others) and the moisture content may change as the fiber soaks up more liquid.


There are several excellent books that deal with whole grain flours:


Thanks for your question, I hope this helps.

photo courtesy of Jaaq | Wikimedia Commons

Monday, April 26, 2010

cottage loaf


Over on my Facebook Fan Page I wrote about a recent experiment in bread making.  I took one of my favorite quick rise bread recipes and used the baking method from no-knead bread.  The bread rose really well.  At first I was sort of disappointed because it rose REALLY well, I was making it in 2 quart pyrex containers (I don't own a 5 quart cast iron dutch oven as called for in no-knead bread) and I wound up with 2 quart-casserole-dish-shaped bread.  However, as you can see from the picture, once turned out of it's container I realized it looked beautiful.    I got a fabulous rise and the crumb is very even and beautiful. 


Helayne asked for the recipe so here it is:


Cottage Loaf
[makes one loaf but doubles very well]


5-6 C. bread flour
2 T. yeast
2 T. evaporated cane juice crystals
1 T. sea salt
1 t. ground ginger
2 C. hot water


In a large bowl mix together 2 C. flour, the yeast, salt, sugar and ground ginger
Add hot water and stir well
Add flour 1 C. at a time until dough is no longer sticky
Knead for 8 minutes until dough is ready (I have a really big bowl and I just knead directly in the bowl)
Oil dough and return to the bowl
Cover with a dishtowel and let rise in a draft free place for one hour
Punch down, shape dough into a ball and place in a bowl lined with a well-floured towel
Recover dough
Take 2 quart covered casserole dish and place in the oven
Set oven to 475
When oven is done preheating open dish, slide dough into dish, place lid back on casserole
Bake 30 minutes then remove lid and bake another 20-25 minutes until bread is done
Remove bread from casserole and cool on wire rack completely before cutting 


The waiting part is very difficult to accomplish as the smell of freshly baked bread permeates the house like nothing else and draws hungry folk in a hurry.


I made this bread using King Arthur Bread Flour.  Although I bake a lot of bread using whole grain or fresh ground flours occasionally I will use unbleached all-purpose or bread flour.  Then I experiment from there to see how much I can modify it and change to less processed grains.  The next experiment with this loaf will be to see if I can substitute 1/2 of the flour for whole wheat and what happens from there.  


I'll keep you posted.

Friday, March 12, 2010

chocolate granola

Today we have a special treat as my friend Christine shares her chocolate granola recipe. I've always loved granola because it's a quick healthy breakfast, a great snack; it's also quick and easy to make. One of the other great things about granola is how it can be changed around to suit individual tastes. The idea of making it in a crockpot, is a big “wow” because it doesn't get any easier than that.

Christine shared the following thoughts with me, “
A friend had told me a little about using dark chocolate. Apparently, it contains 'good' fats, that our bodies need to digest properly. I began to think about the other good fats I've been trying to feed my family, coconut, olive oil, and nuts, etc. Chocolate granola sounded like a good breakfast food. I knew from prior experience that a little coconut oil at breakfast helped me control my appetite. I found a basic recipe and substituted some things and added a few. It smelled wonderful - kind of like chocolate potporri all day. When all seven of us like something, its a keeper! This one will be a regular breakfast item for our family.”

With the addition of ground flax and coconut oil this recipe provides some great fatty acids (flax seeds have omega-3 while coconut oil has medium-chain fatty acids). These healthy fats help provide saiety, or fullness, which means it helps fill you up. Dark chocolate and cocoa provide antioxidants, especially epicatechin (found also in green tea) which protect against cardiovascular disease.

Here's Christine's recipe, as she says it's a big hit with her family, I'm sure it will be for yours as well.

Chocolate Granola
Mix in crock pot:

7 C. organic old fashioned oats
1/2 C. ground flax
1/4 C. organic brown sugar
1/2 C. shredded coconut
Pinch of sea salt
½ C. raw honey
2 T. maple syrup
¼ C. coconut oil
2 T. cocoa powder

Mix well and heat on low all day, stir once in while.

After slightly browned (4-6 hours on low) stir in:
½ C. 70% chocolate or darker, finely chopped
1 C. chopped almonds & walnuts

Cool completely then store in an airtight container

Chocolate granola photo courtesy of Christine Michael Gibson

Friday, March 5, 2010

homemade rolls


Susan asked, "
I wondered if you might have a resource for homemade wheat rolls (or other dinner-y kind of breads) that could be made up to a certain point and then frozen. So that you could make up a whole bunch when you have time, and then just cook a few at a time when you want them. I've been googling and haven't really come up with anything. We're trying to accommodate the starch eater/cravers in the household while substituting for healthier alternatives. Thank you very much for any ideas."

I don't have any whole grain par-baked bread recipes. Part of the difficulty, as I find it, is that working with whole grains changes the gluten structure, the higher fiber retards the rise. So when I try to par-bake and freeze the rolls they never rise right. Freezing the unbaked dough is tough because the freezing process kills the yeast and the thawing bread never seems to rise correctly, adding extra yeast doesn't work because then you're starting all over again.

My suggestion would be to find a whole grain bread recipe that you like and make rolls, soft bread sticks, even slice the loaf after baking, and freeze the results. You can thaw them for those that want it and then warm it up in the over for that "fresh-baked" aroma and warmth.

photo courtesy of Fir002 | Wikimedia Commons

Tuesday, February 9, 2010

diana's delights

I brought a batch of cookies to my book club meeting last night and they were a big hit. Everyone enjoyed them and I came home with only my plate and a few crumbs.

The recipe is one that I created for my daughter, Diana, it is her favorite cookie. This is a recipe that I give out freely in my cooking classes and I thought I would share it here for those who read the blog. There are two changes in the recipe below from what I hand out in class. The original uses fresh ground wheat and I've changed it to King Arthur Whole Wheat for those who don't grind their own flour. I also substituted evaporated cane juice sugar for the sucanat. To learn more about grain substitutions you can read this post and my notes about sugar substitutions can be found here.

Diana's Delights

½ C. butter
1 C. evaporated cane juice crystals
1 egg
½ t. vanilla
1 C. + 2 T. sifted whole wheat flour
½ t. salt
½ t. baking soda
1 C. rolled oats
½ C. chocolate chips
½ C. shredded coconut

preheat oven to 375º
cream butter and sucanat together
add egg and vanilla and mix well
add flour, salt and baking soda and mix well
add oats, chocolate chips and coconut and mix well

scoop 1 tsp balls of dough, roll into rounds and place on greased cookie sheet
bake 10 minutes
let cool 2 minutes on cookie sheet before moving to wire rack

Enjoy!

Monday, February 1, 2010

rescuing biscuits

"Even in failure there is success" or words to that effect.

I recently tried to create a biscuit recipe using 100% whole grain flour. To get to the rescuing part skip to the end; to learn how I got there, read on.

I'll start with a confession and tell you that I while I consider myself to be a fairly good baker and certainly do well with most baked goods there are two things that I'm still working hard at improving. One is pie crusts and the other is biscuits. They usually taste good and are certainly edible but don't always come out the way I envision them.

We recently had a curried sweet potato zucchini soup for dinner and I wanted to serve biscuits with it. Being the whole grain advocate that I am I, of course, wanted them to be 100% whole grain biscuits. One of the challenges of baking with whole grain flour is the way it changes the moisture content and also the loft, or rise, of whatever you are making. This can even be true in recipes where you make a simple switch from all-purpose to whole wheat flour. The additional fiber affects the dough.

As you can see from the picture, the biscuits did rise. But they didn't rise as much as I had imagined they would. Because of the amount of baking powder and baking soda I wasn't sure how much salt to use. They wound up not having enough so they were a bit bland. Although they were tasty enough with the soup, which was very flavorful and satisfying, they were not going to be tasty enough for jam biscuits to go with breakfast the next morning. As a matter of fact they hardened up just enough that I didn't think anyone would want to eat them.

This is where my curious nature sometimes comes into play. Faced with a half a batch of leftover biscuits (the recipe made a dozen) I wondered what you could do with leftover biscuits. My initial thought was to split them, lay them on the bottom of a casserole dish and then pour some sort of a hot fruit compote over them and see if that would work as a bottom crust. When I thought about it further I decided that might not be the best option because it would then probably result in a mushy mess at the bottom of the compote; I couldn't be sure that the biscuits would hold together enough.

Then inspiration struck (here's the rescuing part) since they weren't too salty I wondered if they could be turned into something sweet? I ground them up in my cuisinart. It turns out that 6 biscuits makes approximately 1 1/2 C. of biscuit crumbs. Combined with 6 T. of butter, 2 T. of sugar and a dash of cinnamon they create a nice graham cracker-type crust at the bottom of a pie dish. Topped with a sweet cheese filling (I used quark) and some sour cherries it made a tasty dessert.

While I certainly do not plan on making biscuits for the purpose of their crumbs I now know that at least they can be used to make a decent crust if needed.

Saturday, January 30, 2010

arrowroot

Arrowroot (Maranta arundinacea) is a large rainforest herb. It is also the word used to describe the white, odorless powder made from the starchy root. It contains a very modest amount of calcium and folate.

Arrowroot powder, also referred to as arrowroot starch or arrowroot flour, is frequently used as a thickener for puddings and sauces. It can also be used in baked goods, especially baby biscuits. I like to use it because it is gluten free, therefore easier for those who have digestive issues, and is not corn based, making it a good allergenic free thickening agent. It is considered to be less nutritious than wheat flour, however the superior thickening ability, lack of gluten, and flavorlessness of it make it a preferred choice for me.

According to information found at botanical.com arrowroot is valuable as an aid for digestive ailments such as diarrhea. Add up to one tablespoon to a pint of juice or milk. As with any thickener make a paste first with some cool fluid and then add the hot fluids stirring until thickened.

Using it does take a little getting used to, if you overheat it the thickening action breaks down. I have heard that if you make homemade ice cream you can mix some in with the base and it will prevent crystals from forming in the freezer.

When using arrowroot the substitution is two teaspoons to replace one tablespoon of cornstarch or one teaspoon to replace one tablespoon of flour. Arrowroot flour can be hard to find, my best source of high quality arrowroot flour is Penzey's Spices. If you don't have a one near you, they do have an online store.

photo courtesy of Denis Conrado | Wikimedia Commons


http://www.nutritiondata.com/facts/cereal-grains-and-pasta/5677/2
http://www.botanical.com/botanical/mgmh/a/arrow064.html
http://en.wikipedia.org/wiki/Arrowroot

Saturday, January 16, 2010

banana french toast

Banana french toast makes a delicious breakfast. It's a great way to use up that last banana or two that is close to the edge if you don't have any more room in your freezer.

I freeze bananas two different ways. Peeled and stored in a ziplock they are great for throwing in to smoothies. The frozen consistency gives a little "slush" to the smoothie. If I'm going to use them for baking I leave them in their peels. That way when they are thawed you can snip the ends and they "goosh" right out.

But we've had our fill of smoothies and banana-baked goods lately. Not wanting to store the last banana I decided to use it up a different way. When they were little my girls used to make banana milk by blending together a banana, a cup of milk, and a splash of vanilla. I did made some and soaked the bread in it (leaving out the egg) to make banana French toast. It was delicious. A nice delicate banana-y flavor and we didn't even miss the egg at all. You could even make this vegan by using almond or rice milk instead of cow's milk. I topped mine with some orange marmalade and it was fabulous.

So if you need another way to use up some bananas give this a try, I think you'll enjoy it.

photo courtesy of commons.wikimedia.org

waffled cookies

Experimentation is a wonderful thing. Getting inspired by other recipes and other folks leads to new ideas and new ways of thinking. One of new finds is Waffleizer. By a guy named Dan it was created to answer the all important question, "Will it waffle?" So far the answer seems to be absolutely.

The most recent post was about making s'moreffles - waffled s'mores. What a great concept. Even more amazing was the recipe he shared from Lauren Pett of Rich Chocolates for making waffled graham cracker type cookies. I immediately fell in love with this idea. Aside from my husband's grandmother's Gaufres Liegois, which I make in my Belgian-style waffle maker, I had never really considered waffling cookies before. These call for a standard waffle iron (I confess I own both).

I made a batch of cookies and it has turned out to be a big hit! They're crisp, tasty, and definitely one for the repetoire. I made a couple of changes and my recipe is listed below, I do plan to make a couple more changes. I switched the flour for fresh ground hard white flour and used sucanat instead of brown sugar. I plan to try turbinado sugar the next time because it has more moisture. Because of the sucanat they came out much darker, I may have the same issue with turbinado sugar but won't know until I try it. The whole grain flour has so much more fiber that I'm sure it is making the cookies denser than the original recipe. While it's still delicious I am considering borrowing a concept from the King Arthur Whole Grain Baking baking book and use a modest amount of all-purpose flour.

The cookies are very soft when they come out of the waffle iron which makes them perfect for molding into shapes and my family is eagerly awaiting the next batch which we want to turn into bowls for ice cream. I did learn that getting them to the correct thickness is key. Too thick and they do not have the correct crunch to them. Too thin and they are very dark.

The original recipe can be found here.

Whole Grain Waffled Grahams

2 C. fresh ground hard white flour
1 C. sucanat
1 t. baking soda
3/4 t. sea salt
7 T. organic butter, cut into pieces, chilled
1/3 C. honey
5 T. organic whole milk
2 T. vanilla extract
pinch cinnamon

mix the dry ingredients
in a separate bowl, whisk the milk, honey and vanilla
add the butter to the dry ingredients pulse in food processor until the mixture looks like coarse cornmeal
add the milk mixture to the flour mixture until a dough forms
wrap in plastic and chill for at least two hours, or overnight

on a lightly floured surface, roll out the dough so that it's just over a quarter of an inch thick
I rolled the dough to the size of my waffle maker however you can also punch out or cut out the dough into squares, about 4 inches on each side

waffle the dough, waffle iron heat varies; check the dough after about three minutes
using a fork, pull out of waffle iron and either shape immediately or let rest on a rack (will firm up as it cools)

Enjoy!

PS Sorry, no photos. My not-so-great camera finally gave up the ghost. I went out and bought a new camera which is charging. However I do not think the cookies will last long enough to be photographed.

Thursday, January 14, 2010

local grain source

As many of you know I love to bake. Specifically I love to bake with whole grains. This way my family gets all of the benefit of the grain, the fiber to help slow down the digestion of the starchy endosperm and help stabilize blood sugar, and the germ with all of it's nutrient goodness.

When we moved here I felt fortunate that our local grocery store carried whole grains in the health food section. Unfortunately they recently decided to stop carrying them which left me without a local source. But all of that has changed now thanks to my friend Jinks. Her new website
Yummy Bread Kneads is a new local source for whole grains and she'll be sharing some great recipes.

Be sure to check it out.

photo courtesy of Rainer_Zenz | Wikimedia Commons

Thursday, January 7, 2010

breakfast pudding

It's another cold, wet, grey day here in Texas. A perfect day for breakfast pudding. It's my newest recipe created because I was looking for a different way to make oatmeal. While I love a hearty bowl of oatmeal or an oatmeal smoothie or homemade granola sometimes you want something a little different.

I decided that I would make something along the lines of a baked rice pudding but use oatmeal as the base grain instead of cooked rice. It came out delicious and is our new winter favorite. Although it takes 45 minutes to bake the leftovers are delicious (I actually preferred this on the second day). It makes 6 generous servings so it's perfect for a brunch or weekend breakfast with leftovers for during the week.

Baked Oatmeal Pudding

4 C. milk
1/4 C. turbinado sugar
2 T. butter
1/2 t. sea salt
1 egg
1/2 t. apple pie spice
2 C. rolled oats
1 cored, peeled apple, chopped
1/2 C. chopped walnuts
1/2 C. raisins (or cranberries if you prefer)
1/2 C. ground flax seed
2 T. sesame seeds

preheat oven to 350
in a large sauce pan combine milk, sugar, butter and salt
bring to just under a boil until sugar is dissolved and butter is melted
in a cup beat the egg
slowly add milk 1 T. at a time until egg is warmed (this will prevent curdling)
add egg and remaining ingredients to milk mixture, stirring together
pour into greased 2 quart baking dish
cover dish and place in oven for 45 minutes
remove from oven, uncover and let set for 10 minutes
cut and serve drizzled with maple syrup

Enjoy!

Monday, October 26, 2009

no-knead mesquite bread

Those inventive folks over at Craftzine.com have come up with a new twist on the, by now, ubiquitous no-knead bread. Laura, one of the Editorial Assistants, found my post about mesquite flour and emailed me to let me know about this really fun article on how to harvest and process mesquite to make the flour. It includes a recipe for No-Knead Mesquite Bread which they said I could share with all of you. Living here in Texas I know we have mesquite, but there isn't any in my area. I'm going to have to learn to identify it though so that if I find any in my travels I can harvest the pods.

No Knead Mesquite Bread Recipe

3 cups white flour
3 tbls mesquite flour
½ tsp yeast
1 ½ tsp salt
1 ½ cups of water

Mix dry ingredients in a bowl
Add water and mix
Stir with fork (mix will be sticky)
Cover in a bowl, let sit overnight
Place bread dough on cutting board covered with towel for 2 hours
In metal bowl bake in sun oven @ 350 for 1 hour

photo courtesy of: Wendy Tremayne