Showing posts with label grains. Show all posts

Thursday, October 13, 2011

sprouted flours

sprouted spelt and chia bread | photo:  wattle12
I recently received a question from Hope who wanted to know about sprouted flours (specifically spelt) and how to use them.

Sprouted flours are a very healthy way to go.  Sprouting essentially deactivates some of the enzymes that can interfere with nutrient absorption.  The grains are sprouted, dried at very low heat, and then ground into flour.  If you do not own a mill (I like both the Blendtec and WonderMill) you can purchase sprouted flours from a number of different sources.

Sprouted flours can be easily interchanged with traditional flours one for one.  There is a difference between the fiber content so if you are switching it for all-purpose flour you'll need to make some adjustments to the moisture content as well as to how long it may take to rise.

Regarding her question about spelt specifically, it is a grain similar to wheat but lower in gluten content.  Some people who do not digest wheat well find spelt to be an acceptable alternative.  For those who have celiac disease or gluten intolerance, spelt still needs to be avoided as it does contain gluten.

To Your Health Sprouted Flour Company has some delicious looking recipes on their website which specifically call for sprouted flours.

Saturday, September 17, 2011

what is it?

The birds are very messy and tend to throw seeds everywhere when picking through the large feeder.  I assume they do this because they are looking for their favorite bits.  Having been lazy not weeded very well I found a few large plants growing under the feeder.  At first I thought it was corn which was pretty cool.  So we left them.

Obviously from these pictures, this is most definitely not corn.  I'm not really sure what it is.  It doesn't look like my pictures of either amaranth or millet so I'm stumped.

Unfortunately I don't have the label from the birdseed so I can't even pick it out from there.  Wondering if I should harvest it for the birds for winter or if it's edible by humans.  Anyone able to identify it?


Thursday, September 8, 2011

forbidden rice salad

forbidden rice salad
For tonight's dinner I've made an assortment of salads to serve with burgers for a refreshing, tasty, quick dinner.  I love salads because they're a great way to get variety into your diet and can go with almost anything.  Of course I don't mean the typical green tossed salad.  I'm talking salads with a little oomph and lot of tasty ingredients.

This picture on the left is the forbidden rice salad we'll be having, along with a fruit salad and a savoy slaw, with dinner tonight.  I love forbidden rice.

A black rice with a rich delicious flavor this is a whole grain and provides an antioxidant punch.  It provides a particular antioxidant called anthocyanin (which is also found in blueberries and blackberries) believed to help prevent inflammation, diabetes, and reduce or limit cancer-caused DNA damage.  Regardless of the health effects of the antioxidant properties there is no disputing the fact that this is a tasty way to add more whole grains to your diet.

Forbidden Rice Salad

1 cup black rice
1 3/4 cup water
1/2 teaspoon sea salt
1/3 cup pine nuts
1 large carrot
1 rib celery leaves included
1 red bell pepper
3 spring onions
1 cup edamame
1 tablespoon olive oil
2 tablespoons walnut oil
1 tablespoon water
1 teaspoon dijon mustard
sea salt and pepper

put rice, water and salt into a pot and bring to just under a boil on the stovetop
cover, reduce heat and cook until rice is done 20-25 minutes

while the rice is cooking toast pine nuts in a dry pan until just starting to turn brown
remove from heat and let sit

dice the vegetables except the edamame
note:  I use the large shred on my box shredded to get large slivers of carrot rather than a dice
combine the vegetables together in a bowl
note 2:  unfortunately I discovered I am out of edamame, the recipe really is better with them in there

in a separate container whisk together the oils, vinegar, water, mustard, salt and pepper
note:  I like to use walnut oil because it compliments the nutty taste of the rice and the flavor of the pine nuts

when the rice is done uncover it, remove from heat and let it sit 10-15 minutes to cool off and to stop steaming
combine all ingredients together, toss well and refrigerate for 2-4 hours before serving

Saturday, January 29, 2011

reinventing comfort

When I was a little girl my mother used to make something called rice cereal.  My brother and I loved it.  Leftover white rice in a bowl of hot milk with a huge dollop of butter and a spoonful of sugar on top.  It brings back memories of the small kitchen we had when we were young.  Sitting at the table with my brother, legs swinging, enjoying this dish which we viewed as a treat.

When my children were growing up I would make the same dish for them.  And they loved it just as much.  Even now my 16 year old will assemble a bowl if we have the ingredients at hand (which we often do).  It was a great way to use up extra rice -- filling, tasty, and warming to the tummy.  I even served it on occasion to overnight guests.   One such guest, a dear friend from my high-school days, exclaimed about this wonderful breakfast, wanting to know where the recipe came from.  My answer?  My mom.  And probably from her mom.  I think it was simply a frugal way to use leftovers.  But it sure was, and still is, tasty.

Sometimes you have a day where you want comfort food.  This morning was one of those days.  As I was assembling, and then happily eating, my bowl of comfort I realized that I have changed the recipe.  Modified it to be more in line with my healthier eating habits.  But it was still just as comforting, warming and satisfying as it ever was.  Reflecting on this I realized that the concept of comfort food is a state of mind.  Yes it's a comfort to the tummy and makes us feel good; but part of what makes us feel good is the memories associated with that food.  Changing the food doesn't change the comfort level as long as the basic concepts are the same.

So I'm making an offer, what are your comfort foods?  What do you eat when you feel the need for that emotional lift?  Share the recipe and the concept below.  If you'd like (and please ask below) I'm happy to make suggestions to help boost the nutrition or health factor while still helping you get that bowl or plate of comfort you are after.  Eating well to be well doesn't mean we can't still have comfort.

reinventing comfort

When I was a little girl my mother used to make something called rice cereal.  My brother and I loved it.  Leftover white rice in a bowl of hot milk with a huge dollop of butter and a spoonful of sugar on top.  When I had children I would make the same dish for them.  It was a great way to use up extra rice -- filling, tasty, and warming to the tummy.  I would even serve it to guests sometimes.   One time a friend exclaimed about this wonderful dish, wanting to know where the recipe came from.  My answer?  My mom.  And probably from her mom.  I think it was simply a frugal way to use leftovers.  But it sure was tasty.

Sometimes you have a day where you want comfort food.  This morning was one of those days.  As I was assembling, and then happily eating, my bowl of comfort I realized that I have changed the recipe.  Modified it to be more in line with my healthier eating habits.  But it was still just as comforting, warming and satisfying as it ever was.  Reflecting on this I realized that the concept of comfort food is a state of mind.  Yes it's a comfort to the tummy and makes us feel good; but part of what makes us feel good is the memories associated with that food.  Changing the food doesn't change the comfort level as long as the basic concepts are the same.

So I'm making an offer, what are your comfort foods?  What do you eat when you feel the need for that emotional lift?  Share the recipe and the concept below.  If you'd like (and please ask below) I'm happy to make suggestions to help boost the nutrition or health factor while still helping you get that bowl or plate of comfort you are after.  Eating well to be well doesn't mean we can't still have comfort.

Sunday, October 31, 2010

energy bars

Energy bars are a great snack to have in your pantry.  They are handy and healthy for after school, wonderful if you need a little something in the afternoon to tide you over until dinner, great for after a workout, and easily portable for on the road.  Unfortunately many of the commercial bars are loaded with chemicals and preservatives (which should be avoided as much as possible).


You can bypass the chemicals and preservatives in commercial energy bars if you make them yourself.  My favorite way to do this is to start with a batch of my own Great Granola.  It's easy to make in your slow cooker, delicious, healthy, and very reasonably priced.  The overall cost of these homemade energy bars is typically less than purchasing them in the store.


To boost the nutrition of my energy bars I add sesame seeds, which are high in copper, manganese, calcium, magnesium, iron, and zinc.  They also add fiber and a great nutty flavor.  Another addition is almond butter.  Almonds are an alkalizing nut with heart healthy monounsaturated fat.  Studies have shown they can limit the rise in blood sugar which normally happens after you eat; they also provide antioxidants.  Almond butter can be purchased in a number of grocery stores from the grind-your-own machine, you can make it very easily in a food processor, or you can purchase commercial varieties.  If you purchase commercial almond butter look for one with no added oil, sugar, or preservatives.


After making the bars I wrap them individually in wax paper and store them in an airtight container.  They keep well although given their popularity I have yet to figure out exactly how long they will last.


Great Granola Energy Bars
makes 16


3 C. granola
3/4 C. sesame seeds
1 C. almond butter
1/2 C. raw honey


Toast sesame seeds lightly in a pan until golden
In a double boiler combine almond butter and honey
Stir together as it begins to soften and melt
When very warm and liquid add in sesame seeds
In a large bowl thoroughly combine granola and honey, almond butter, sesame seeds
Oil a baking pan (I use either grapeseed or walnut oil)
Pour mixture onto pan
Lightly oil your hands and press mixture onto the pan
Allow mixture to cool completely before cutting into bars

Monday, October 18, 2010

what kind of oats?

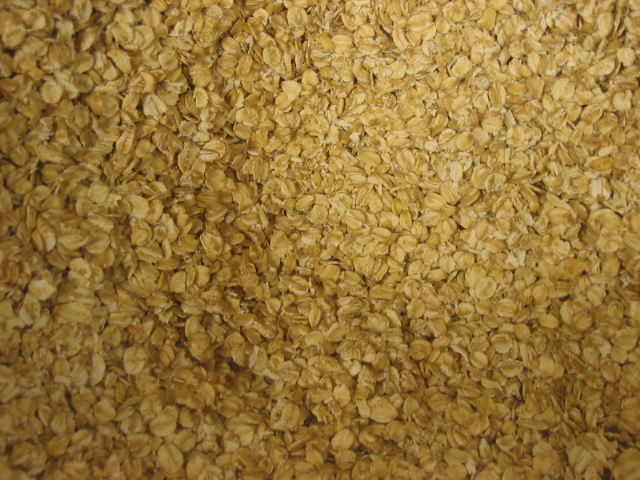
Oats | kateshortforbob | Wikimedia Commons
Bob wrote in and asked "I have heard that not all oatmeal has the same nutritional value, and I'm confused. There are so many types of oatmeal, steel-cut, instant, etc, etc. What is the most nutritious type?"

This comes up a lot. We're told that oats are really good for us, they are, and that we should eat more of them for reducing cholesterol, to help reduce cardiovascular disease and to stabilize blood sugar. Oats are a wonderful food. They contain both soluble and insoluble fiber. Soluble fiber is easily digested and helps the body by slowing down how quickly it can process simple starches and sugars. Soluble fiber also breaks down within the digestive tract, binding with cholesterol and thereby escorting it out of the body. Insoluble fiber cannot be digested and helps to create bulkier stools which move through the system more quickly. They also help mitigate certain bile acids.

More than just fiber, oats also provide manganese, selenium, tryptophan, phosphorus, and magnesium. They even provide a modest amount of protein (6 g per cup).

Quick or instant oatmeal is not as good a choice since it is broken down; your body can get through it too quickly. It's also it's more highly processed and the more processed a food is is the less nutritious it typically is. Oat groats and steel cut oats are generally considered to be the best. The groats are the whole grain, containing all of the fiber, bran and the beneficial germ. Old fashioned or rolled oats are also very good although they don't have all of the bran since some of that is removed during the rolling, or flaking, process.  I keep all three, oat groats, steel cut oats, and thick rolled oats, in my pantry all the time.  They're very versatile and are great for a wide range of recipes.

One cup of oats per day is considered to be very beneficial, especially if you have high cholesterol or are looking for foods to help stabilize blood sugar. Making it with milk will add more protein and some calcium. Adding fresh ground flax seeds, about one tablespoon, will further increase the fiber content and add a healthy omega 3 boost. Adding fresh berries, my favorite is blueberries is great, a dash of cinnamon on top and you've got a really great meal to get you going in the morning.


Monday, July 19, 2010

grains are good

Lately I've had several people mention to me that perhaps I need to change the name of my business, Grains&More.  Their thinking is that because so many people "can't eat grains anymore" I might want to consider a different moniker.


As I question them further it becomes very apparent that they are talking about those folks who cannot have wheat or who must avoid gluten due to celiac or other gluten-intolerant issues.  And I find myself saying the same thing to all of them.


Grains are an important part of our diet.  Just because you cannot eat those grains that have gluten in them does not mean you cannot have grains.  As a matter of fact, there are more grains that do not have gluten than there are grains that do.  The gluten containing grains are wheat, spelt, rye, and barley.  The non-glutinous grains are rice, amaranth, teff, quinoa, corn, buckwheat, sorghum, millet, and job's tears.  Oats fall into a special category.  They do not contain gluten in and of themselves, however they are so frequently grown near, stored with, transported with wheat that they can be contaminated.  Therefore many people who cannot consume gluten either look for certified gluten-free oats or avoid them all together.


Just as a reminder, gluten is actually comprised of glutenin and gliadin which are present in the endosperm (or starchy part) of certain grains.  They make up most of the protein in the grain.  In many cultures the gluten is carefully separated from the grain and used as an important protein component in the diet, sometimes being referred to as seitan.  Those grains that are considered gluten-free do not have gliadin in them.


If you cannot eat gluten that does not mean you cannot eat grains.  As I've said, they are an important part of the diet, providing fiber as well as beneficial oils from the germ which contain antioxidants and are rich in vitamin E and B.  


So in case you were wondering, I'm still Grains&More, I still believe in and promote consuming grains as a part of a healthy diet and I'm not changing my name.


photo courtesy of Fir0002 | Wikimedia Commons

Monday, May 10, 2010

grinding flour

Claire wrote in and asked, "I have a question re: grinding your own flours out of grains, say brown rice flour, garbanzo bean flour, etc. When you do it, do you soak the grains/beans before you grind it? I soak everything over night (my grains, beans and nuts) before I cook it. I learned this from my Natural Chef class as soaking deactivates the phytic acid that acts as enzyme inhibitors and makes it more digestable. Cooking alone helps to some extent, but not as good as soaking. I am just wondering if I do soak it first, do I need an extra step, say, using a dehydrator to dry it before I grind it.

The reason I'd like to get the model Super 5200 from Vitamix, is that in addition to a wet container that's good for processing wet goods, there is an additional dry container that has a special set of blades that are designed for grinding flours. Then it follows that do I need to also get a dehydrator before I can even grind it?"


I'll start by saying that yes there is another container that can grind grains and beans into flours.  I use a Wondermill which does a great job and can grind to several different levels of fineness.  You cannot grind wet or oily items (flax seeds, wet sprouts, nuts, etc.) in the electric version.


As far as soaking goes there are a few different ways to do it.  The first is to soak, dry (either in a dehydrator or in an oven set to very low temp for a long time) and then grind.  Another is to sprout, dry and then grind.  The picture above shows flour made from sprouted wheat and sprouted spelt; you can see that the texture is no different than if you use the whole grain.  The third is to grind your grains into flour and then soak the flour overnight before using it, this is the method that I use most.  Any of these methods will work well, it's up to you to determine if you want to use the oven method or purchase a dehydrator.


Using fresh ground flour is an excellent idea because many nutrients are stripped out by commercial processing.  Additionally, if you use fresh ground flour you are getting the full benefit of the germ, which is where all of the beneficial oils are.  It is important to note that using fresh ground flour may require a modification to your recipe because the extra fiber can retard the rise of gluten (requiring a longer rise time or the addition of leavening agents such as vital wheat gluten, lecithin, ascorbic acid or others) and the moisture content may change as the fiber soaks up more liquid.


There are several excellent books that deal with whole grain flours:


Thanks for your question, I hope this helps.

photo courtesy of Jaaq | Wikimedia Commons

Wednesday, April 14, 2010

quinoa tabbouleh


This recipe was inspired by Chef Rachel over at thehealthycookingcoach.com where I got the idea to use quinoa instead of bulghur wheat.  It has been a change that wins rave reviews from everyone who tries it.

Tabbouleh is a Middle Eastern salad dish; it makes a great meal when paired with falafel (fried chickpea patties), dolmas (stuffed grape leaves), hummus and other Middle Eastern
or Mediterranean food items.

Most tabbouleh is made with parsley and mint.  In this recipe I exchanged the mint for cilantro which makes a delicious change and gives it a bit of a kick.  Rich in phytonutrients, fiber, iron and magnesium the cilantro adds even more to the nutrient profile of this recipe.

Quinoa is a gluten free grain with a lot of fiber, high in B vitamins, calcium and iron; it also has balanced amino acids which gives it a good protein profile. Before you use quinoa
you need to wash it (unless you buy pre-washed) because the outer coating has saponins on it. If they don't get washed off they will make the grain taste soapy. When cooking quinoa the ratio is pretty much the same as rice, two cups of water to one cup of grain, simmered for 14-18 minutes.

Quinoa Tabbouleh

2 C. cooked quinoa
1 C. finely minced cilantro
½ C. minced parsley
1 clove garlic minced
1 t. sea salt
1 C. cherry tomatoes – halved
1 red pepper, small dice
3 scallions, mostly white part, minced
3 T. fresh lemon juice
2 T. olive oil
¼ C. pine nuts
Fresh ground pepper on top

Mix it all together, stir it well.

Enjoy!

Friday, March 12, 2010

chocolate granola

Today we have a special treat as my friend Christine shares her chocolate granola recipe. I've always loved granola because it's a quick healthy breakfast, a great snack; it's also quick and easy to make. One of the other great things about granola is how it can be changed around to suit individual tastes. The idea of making it in a crockpot, is a big “wow” because it doesn't get any easier than that.

Christine shared the following thoughts with me, “
A friend had told me a little about using dark chocolate. Apparently, it contains 'good' fats, that our bodies need to digest properly. I began to think about the other good fats I've been trying to feed my family, coconut, olive oil, and nuts, etc. Chocolate granola sounded like a good breakfast food. I knew from prior experience that a little coconut oil at breakfast helped me control my appetite. I found a basic recipe and substituted some things and added a few. It smelled wonderful - kind of like chocolate potporri all day. When all seven of us like something, its a keeper! This one will be a regular breakfast item for our family.”

With the addition of ground flax and coconut oil this recipe provides some great fatty acids (flax seeds have omega-3 while coconut oil has medium-chain fatty acids). These healthy fats help provide saiety, or fullness, which means it helps fill you up. Dark chocolate and cocoa provide antioxidants, especially epicatechin (found also in green tea) which protect against cardiovascular disease.

Here's Christine's recipe, as she says it's a big hit with her family, I'm sure it will be for yours as well.

Chocolate Granola
Mix in crock pot:

7 C. organic old fashioned oats
1/2 C. ground flax
1/4 C. organic brown sugar
1/2 C. shredded coconut
Pinch of sea salt
½ C. raw honey
2 T. maple syrup
¼ C. coconut oil
2 T. cocoa powder

Mix well and heat on low all day, stir once in while.

After slightly browned (4-6 hours on low) stir in:
½ C. 70% chocolate or darker, finely chopped
1 C. chopped almonds & walnuts

Cool completely then store in an airtight container

Chocolate granola photo courtesy of Christine Michael Gibson

Monday, February 1, 2010

rescuing biscuits

"Even in failure there is success" or words to that effect.

I recently tried to create a biscuit recipe using 100% whole grain flour. To get to the rescuing part skip to the end; to learn how I got there, read on.

I'll start with a confession and tell you that I while I consider myself to be a fairly good baker and certainly do well with most baked goods there are two things that I'm still working hard at improving. One is pie crusts and the other is biscuits. They usually taste good and are certainly edible but don't always come out the way I envision them.

We recently had a curried sweet potato zucchini soup for dinner and I wanted to serve biscuits with it. Being the whole grain advocate that I am I, of course, wanted them to be 100% whole grain biscuits. One of the challenges of baking with whole grain flour is the way it changes the moisture content and also the loft, or rise, of whatever you are making. This can even be true in recipes where you make a simple switch from all-purpose to whole wheat flour. The additional fiber affects the dough.

As you can see from the picture, the biscuits did rise. But they didn't rise as much as I had imagined they would. Because of the amount of baking powder and baking soda I wasn't sure how much salt to use. They wound up not having enough so they were a bit bland. Although they were tasty enough with the soup, which was very flavorful and satisfying, they were not going to be tasty enough for jam biscuits to go with breakfast the next morning. As a matter of fact they hardened up just enough that I didn't think anyone would want to eat them.

This is where my curious nature sometimes comes into play. Faced with a half a batch of leftover biscuits (the recipe made a dozen) I wondered what you could do with leftover biscuits. My initial thought was to split them, lay them on the bottom of a casserole dish and then pour some sort of a hot fruit compote over them and see if that would work as a bottom crust. When I thought about it further I decided that might not be the best option because it would then probably result in a mushy mess at the bottom of the compote; I couldn't be sure that the biscuits would hold together enough.

Then inspiration struck (here's the rescuing part) since they weren't too salty I wondered if they could be turned into something sweet? I ground them up in my cuisinart. It turns out that 6 biscuits makes approximately 1 1/2 C. of biscuit crumbs. Combined with 6 T. of butter, 2 T. of sugar and a dash of cinnamon they create a nice graham cracker-type crust at the bottom of a pie dish. Topped with a sweet cheese filling (I used quark) and some sour cherries it made a tasty dessert.

While I certainly do not plan on making biscuits for the purpose of their crumbs I now know that at least they can be used to make a decent crust if needed.

Friday, January 29, 2010

revisiting tuscan stew

The Tuscan Stew appears to have been well received. First Carol wrote in with her notes about it; now Claire has written in and provided this beautiful picture as well (thank you so much for that, I really am not good at photographs and need to work on that).

Claire writes, "Tonight I invited my girl friend over for dinner and used your recipe to cook the lentil dish . I added a lot of Italian seasoning and ground basil and the aroma when the stew was simmering was just fantastic. Both my friend and I enjoyed the flavor as well. She needed to add some salt to it as I didn't put salt. But for me this dish is so flavorful, even without salt I didn't feel like it was missing anything (plus the chicken stock already contains sodium). I like the combination of the colors, textures and flavors of the Italian seasoning, tomatoes, onions and lentils, which really works! We served it over brown rice and it was great!

Thanks for your creativity & recipe. I have always enjoyed reading your posting about nutrition and yummy recipes. Keep up the great work!
"

I'm really glad that people are enjoying this recipe so much. It's become a new favorite in our house and if you haven't tried it I hope you will.

Thanks also for the comments, I love hearing back from folks.

Monday, January 18, 2010

Tuscan Stew

I love lentils. They are tasty little legumes that pack a powerful nutrition punch. High in fiber, protein, folate, iron, potassium, folate, and manganese they are quick cooking and easy to use in a wide variety of dishes and cuisines. Lentils, referred to in Indian cuisine as daal, come in a number of different colors/types. There are the traditional brown lentils that most of us see at the grocery store however you can also purchase red lentils, which have less fiber, the dark French green, yellow and a type called Masoor which are brown on the outside but red on the inside. When combined with a grain, such as rice, you get a complete protein as all of the essential amino acids are present.

This recipe is one that I created as sort of an Italian style ratatouille, a French peasant stew. I substituted the lentils for the eggplant to give a protein boost and it's a great variation. Served over polenta with a side of spinach sauteed with garlic, lemon and italian spices it makes a fabulous meal. The leftovers, if there are any, are even better than the original because the flavors continue to mellow and combine even after cooking.

Tuscan Stew

1 C. lentils rinsed and picked over
1 onion chopped small
3 cloves garlic minced
3 zucchini cut into 1/2" slices
1 bell pepper diced
3 tomatoes diced
1 1/2 t. Italian herbs
1/2 t. red pepper flakes
2 T. olive oil
2 1/2 C. vegetable stock

In a stock pot heat olive oil and saute onion and garlic until onion is starting to soften
add the herbs and bell pepper and saute one more minute
add remaining ingredients and simmer on med-low until lentils are done, about 30 minutes
you may need another 1/2 C. of stock
salt to taste
serve over polenta and top with fresh grated parmesan cheese

Polenta

1 C. cornmeal (I prefer fresh ground but you can use storebought)
1 t. salt
3 C. water

bring water and salt to a boil
reduce water to a simmer
very slowly add cornmeal (this is important to avoid lumps)
cook approximately 20 minutes until mixture thickens
remove from heat and pour into a pie plate (for triangles) or a cake pan (for squares)
let polenta set for 10-15 minutes
cut and serve

Edit: Carol wrote in and shared her method for making polenta "I put the mixture into the top of a double boiler and then don't need to keep stirring or even to check it, until it is about ready and it does not scorch if I don't check right on time."

I plan to try this the next time I make polenta

Enjoy!

photo courtesy of Justin Cormack : wikimedia commons

Saturday, January 16, 2010

waffled cookies

Experimentation is a wonderful thing. Getting inspired by other recipes and other folks leads to new ideas and new ways of thinking. One of new finds is Waffleizer. By a guy named Dan it was created to answer the all important question, "Will it waffle?" So far the answer seems to be absolutely.

The most recent post was about making s'moreffles - waffled s'mores. What a great concept. Even more amazing was the recipe he shared from Lauren Pett of Rich Chocolates for making waffled graham cracker type cookies. I immediately fell in love with this idea. Aside from my husband's grandmother's Gaufres Liegois, which I make in my Belgian-style waffle maker, I had never really considered waffling cookies before. These call for a standard waffle iron (I confess I own both).

I made a batch of cookies and it has turned out to be a big hit! They're crisp, tasty, and definitely one for the repetoire. I made a couple of changes and my recipe is listed below, I do plan to make a couple more changes. I switched the flour for fresh ground hard white flour and used sucanat instead of brown sugar. I plan to try turbinado sugar the next time because it has more moisture. Because of the sucanat they came out much darker, I may have the same issue with turbinado sugar but won't know until I try it. The whole grain flour has so much more fiber that I'm sure it is making the cookies denser than the original recipe. While it's still delicious I am considering borrowing a concept from the King Arthur Whole Grain Baking baking book and use a modest amount of all-purpose flour.

The cookies are very soft when they come out of the waffle iron which makes them perfect for molding into shapes and my family is eagerly awaiting the next batch which we want to turn into bowls for ice cream. I did learn that getting them to the correct thickness is key. Too thick and they do not have the correct crunch to them. Too thin and they are very dark.

The original recipe can be found here.

Whole Grain Waffled Grahams

2 C. fresh ground hard white flour
1 C. sucanat
1 t. baking soda
3/4 t. sea salt
7 T. organic butter, cut into pieces, chilled
1/3 C. honey
5 T. organic whole milk
2 T. vanilla extract
pinch cinnamon

mix the dry ingredients
in a separate bowl, whisk the milk, honey and vanilla
add the butter to the dry ingredients pulse in food processor until the mixture looks like coarse cornmeal
add the milk mixture to the flour mixture until a dough forms
wrap in plastic and chill for at least two hours, or overnight

on a lightly floured surface, roll out the dough so that it's just over a quarter of an inch thick
I rolled the dough to the size of my waffle maker however you can also punch out or cut out the dough into squares, about 4 inches on each side

waffle the dough, waffle iron heat varies; check the dough after about three minutes
using a fork, pull out of waffle iron and either shape immediately or let rest on a rack (will firm up as it cools)

Enjoy!

PS Sorry, no photos. My not-so-great camera finally gave up the ghost. I went out and bought a new camera which is charging. However I do not think the cookies will last long enough to be photographed.

Thursday, January 14, 2010

local grain source

As many of you know I love to bake. Specifically I love to bake with whole grains. This way my family gets all of the benefit of the grain, the fiber to help slow down the digestion of the starchy endosperm and help stabilize blood sugar, and the germ with all of it's nutrient goodness.

When we moved here I felt fortunate that our local grocery store carried whole grains in the health food section. Unfortunately they recently decided to stop carrying them which left me without a local source. But all of that has changed now thanks to my friend Jinks. Her new website
Yummy Bread Kneads is a new local source for whole grains and she'll be sharing some great recipes.

Be sure to check it out.

photo courtesy of Rainer_Zenz | Wikimedia Commons

Thursday, October 22, 2009

strawberry-colada scones

Having leftover fresh ground flour from the ricotta pancakes I decided to make some scones. Scones are great. Not as dense as muffins, the right size for a snack and, like muffins, very pliable to modification. Rummaging around the pantry and fridge revealed some strawberry yogurt and the last little bit of shredded coconut so strawberry-colada became the flavor of the day. Unfortunately I did not have any fresh or dried strawberries which I think would have made these scones even better; the currants worked well but the scones were a little light in the strawberry flavor. In the future I'll make sure to have strawberries available the next time I want to bake these.

In the past when I have made scone recipes using fresh ground flour I find that sometimes they are more dense than I'd like. Wanting to make sure these were light more fluffy I separated the egg. If you are using a whole grain flour you may want to do the same.

Strawberry-Colada Scones

1 C. oat flour
1 C. brown rice flour
1/3 C. evaporated cane juice crystals
2 t. baking powder
1/2 t. baking soda
generous pinch of sea salt
1 C. strawberry yogurt
1 egg separated
1/4 C. coconut oil melted
1/2 C. currants
1/2 C. shredded coconut

preheat oven to 400
beat egg whites until peak forms, set aside
mix together egg yolk, coconut oil and yogurt until fully blended
in a separate bowl mix together flour, cane juice crystals, baking powder, baking soda, and salt
add dry mixture to yogurt mixture until just moistened
gently fold in currants and shredded coconut
gently fold in egg whites
drop by tablespoons onto a greased baking sheet
bake 15 minutes or until golden brown
let cool 2 minutes on baking sheet before transferring to rack

Enjoy!


Tuesday, October 20, 2009

ricotta pancakes with honey glazed plums

Cooking and baking is always an adventure. Inspiration is all around you if you are open to it. There's no real explanation for why or how ideas come together but I can honestly say that frequently it's a matter of "oh gosh there's X in the fridge and I better use it up." Then I make something using that ingredient. Most of the time I make tried and true recipes, either my own or those from trusted cookbooks. Sometimes the inspiration is something I ate elsewhere that I really liked and have been given the recipe. Other times the recipes find me but I somehow can't help playing with them a little bit.

Such is the case with today's breakfast. The inspiration was a click-through twitter post that brought me to Almost Bourdain's (AB's) blog, which I just discovered and like a lot. He credits his inspiration for this recipe to Bill Granger, I credit my inspiration to him. It's kind of neat how that works, we're all connected by this idea of ricotta in pancakes but we each put a slightly different twist to it; all of them, I'm sure, very delicious.

My changes came about because I am trying to work more with gluten free recipes lately. These are for a few people I know who are faced with gluten sensitivity. It's also, as always, inspired by what I have on hand. AB's version calls for bananas and honeycomb. I didn't have enough bananas but did have plums. Didn't have any honeycomb either (and I miss my friends from CT who used to supply me with it) but I did have honey. Together with some breakfast sausage this made a great meal and is definitely on the repeat again list. I hope you like it too.

Ricotta Pancakes with Honey Glazed Plums

For pancakes:

1 1/3 C. ricotta cheese
3/4 C. buttermilk (for a little tang to offset the honey glazed plums)
4 eggs separated
1/2 C. fresh ground oat flour
1/2 C. fresh ground brown rice flour
1 t. baking powder
1 t. vanilla
pinch salt

beat egg whites until peaks form, set aside
mix ricotta, egg yolks, vanilla, and buttermilk together until well blended
mix together flours, baking powder and salt
gently add flours into ricotta mixture
gently fold egg whites into mixture until just blended
drop by 1/4 C. measure into medium hot, greased pan
after 2 minutes flip to cook other side

For honey-glazed plums:

2 plums
2 T. honey
1/2 t. cinnamon
2 t. butter

cut plums into bite sized pieces
toss with honey and cinnamon
in a medium-hot pan melt butter
add plum mixture and stir until plums begin to soften just a little (about 7 minutes)

serve pancakes with plums on top

Honestly these were fabulous. I would even consider serving them as a dessert by making the pancakes smaller and putting a dollop of creme fraiche on top with a dusting of cinnamon.

Thursday, October 15, 2009

pumpkin oat breakfast bars

My friend Erin recently shared this fabulous recipe for a great on-the-go-snack bar. With pumpkins in season it's easy enough to make your own puree. If you don't have the time or inclination to make your own, the canned stuff works just fine. One word of caution, when choosing canned pumpkin I highly recommend that you read the label and make sure that you are getting only 100% pumpkin. You don't need all those other ingredients.


Pumpkin Oat Breakfast Bars (make ahead for quick breakfast or breakfast that must travel with you)

3/4 cup pumpkin purée (can be canned)
2 eggs
1/4 cup butter or ghee at room temperature
1 large or 2 small ripe bananas
1/4 cup honey
2 cups rolled oats (not the quick cook variety)
1/2 cup pecans, chopped (can use walnuts or sunflower seeds)
2 Tbsp shredded coconut, unsweetened
1/4 cup oat bran (optional)
1/2 tsp cinnamon, ground
pinch of Celtic sea salt
1 Tbsp grated orange rind from an organic orange (optional)
1/4 cup dried currants
1/4 cup dried blueberries, wild

Measure out the 2 cups of oats and pour just enough warm water over them to cover them.
Soak for about 5 minutes while you’re mixing up the wet ingredients.
In a mixing bowl, stir together the pumpkin, eggs, butter or ghee, honey and banana.
You may want to mash the banana before adding to the bowl if it’s not really soft.
Before adding the oats, drain them well; add the oats, nuts, coconut, oat bran, cinnamon, salt, orange rind, currants and blueberries, and stir until ingredients are well combined.
Spread mixture into a lightly greased (butter, ghee or coconut oil) pan so the batter is no more than an inch or two deep. An 8” x 10” baking dish works well.
Bake in a 350 degree oven for 40 minutes or until it’s beginning to brown.
If they fall apart when you cut them into bars, you might try baking for about 10 minutes longer.
For very crisp bars, remove from the pan and cool completely on a wire rack.
Cut the bars when cool.

If you want to learn more about Erin you can visit her website.

photo courtesy of Waldo Jaquith:commons.wikimedia.com

Thursday, September 17, 2009

changing a recipe

Missy had a few questions about changing the flour in recipes, away from using wheat flour, for a ginger snap cookie she wanted to make. You can certainly substitute flours but it is important to remember that if you are using whole grain flours the density of your baked goods may vary a little bit. Also, it's important to let the batter sit for a few minutes to allow the extra fiber to absorb some of the liquid in the recipe. If you are using gluten free flours you may need to add stabilizers or thickeners to replace the missing gluten.

I have a few tips about whole grain baking and some yummy recipes on the blog, you can find the baking section
here.

Missy also wrote that she was going to replace the butter in her cookie recipe with crisco. I don't actually recommend the use of crisco; it is a hydrogenated vegetable oil and hydrogenated foods are not a healthy choice. Instead a better substitute would be coconut oil. While I am not sure exactly why she is choosing to substitute for the butter, since it is a healthy fat, coconut oil is a healthy choice and provides lauric, caprylic and capric acids, all very beneficial. [ed note: I misunderstood, Missy substituted butter for crisco which is a much better choice. If you wanted to go dairy free you could still substitute the coconut oil for the butter.]

If you are looking to reduc fat, depending on how much butter the recipe calls for (and most ginger cookies call for a lot), you can substitute up to 1/2 of the amount with applesauce. This gives a great flavor and adds moisture if needed. With ginger snaps, if you are looking for a true "snap" you won't get it with the applesauce, but if you are just looking for a soft gingery cookie you could start by substituting 1/4 the amount of fat called for with applesauce. The applesauce gives no discernable flavor. Other substitutes for fat include pumpkin butter and prune puree both of which have a flavor but it is one that can be successfully paired with the other flavors of your baked goods to enhance them.

I will share from personal experience that if you try to change everything at once you may find that you get an unpleasant result and that you're not sure why it happened. I usually change the flour first, then the fat, then the sugar. I've made some great doorstops/hockey pucks in my time by switching everything in the recipe and not understanding where I need to make further changes. Keeping notes along the way helps me to understand the evolution of the recipe.

Missy was also thinking of replacing the sugar with sucanat. This is an excellent choice, especially for a ginger cookie. Sucanat stands for SUgar CAne NATural, a very low process sugar that still retains a lot of the molasses. This gives it a very dark flavor that compliments the ginger a lot. I have written more about sweeteners here.

If you're looking for a good gingersnap type recipe here is one that I was given by my friend Barb. It's a fabulous, tasty recipe, perfect for the fall season.

Barb's Gingerthins

Melt 3 sticks of butter
Mix together with 2 C. Sucanat
Add 2 eggs
Add 2 t. baking powder, 2 t. cinnamon, 1 t. ginger, 1 t. cloves
Add 5 cups. soft white flour (if you don't mill your own you can use King Arthur White Whole Wheat)
Mix well

Let dough sit in fridge for 20 minutes while preheating the oven to 350 F

Make small balls, roll in Sucanat/cinnamon mixture or white sugar and bake on un-greased cookie sheet 8-10 minutes

Let cookies sit 1-2 minutes on cookie sheet before transferring to cookie rack

photo courtesy of commons.wikimedia.org